Coding with Microbits

Twice I have attended the Ontario Teachers’ Federation “Pedagogy before Technology” conference in the summer.  This year I attended a design workshop that the InkSmith company provided and would never have been able to predict the chain of events that would follow.  In the workshop we were grouped with people at our table to come up with a design concept and present it in the manner of a “Dragon’s Den” pitch.  As we discussed the concept and made diagrams on chart paper, I put the visuals together in a small Google Slide presentation and added an entertaining video.  I have my drama specialist and I’m not afraid to ham it up in front of a crowd.  When it came time for the presentation we wowed the InkSmith team and ended up presenting to the entire group.  We then went to lunch and I didn’t really think too much more about it.  However, because I had so loudly and visibly put myself out there in an entertaining way, I was contacted by the team at InkSmith and then connected with kidscodejeunesse team.  Kids Code is a federally funded program that helps students learn to code.  They provide free workshops to classrooms across the country using handheld, programmable micro-computers called micro:bits. The coding program is web based and is in the blockly format but can also be switched to html for more advanced coders.  When a workshop is provided to a classroom, the teacher is provided with ten microbits for the class to use and keep.  You can visit the website kidscodejeunesse to sign up for a workshop for your classroom.

microbit

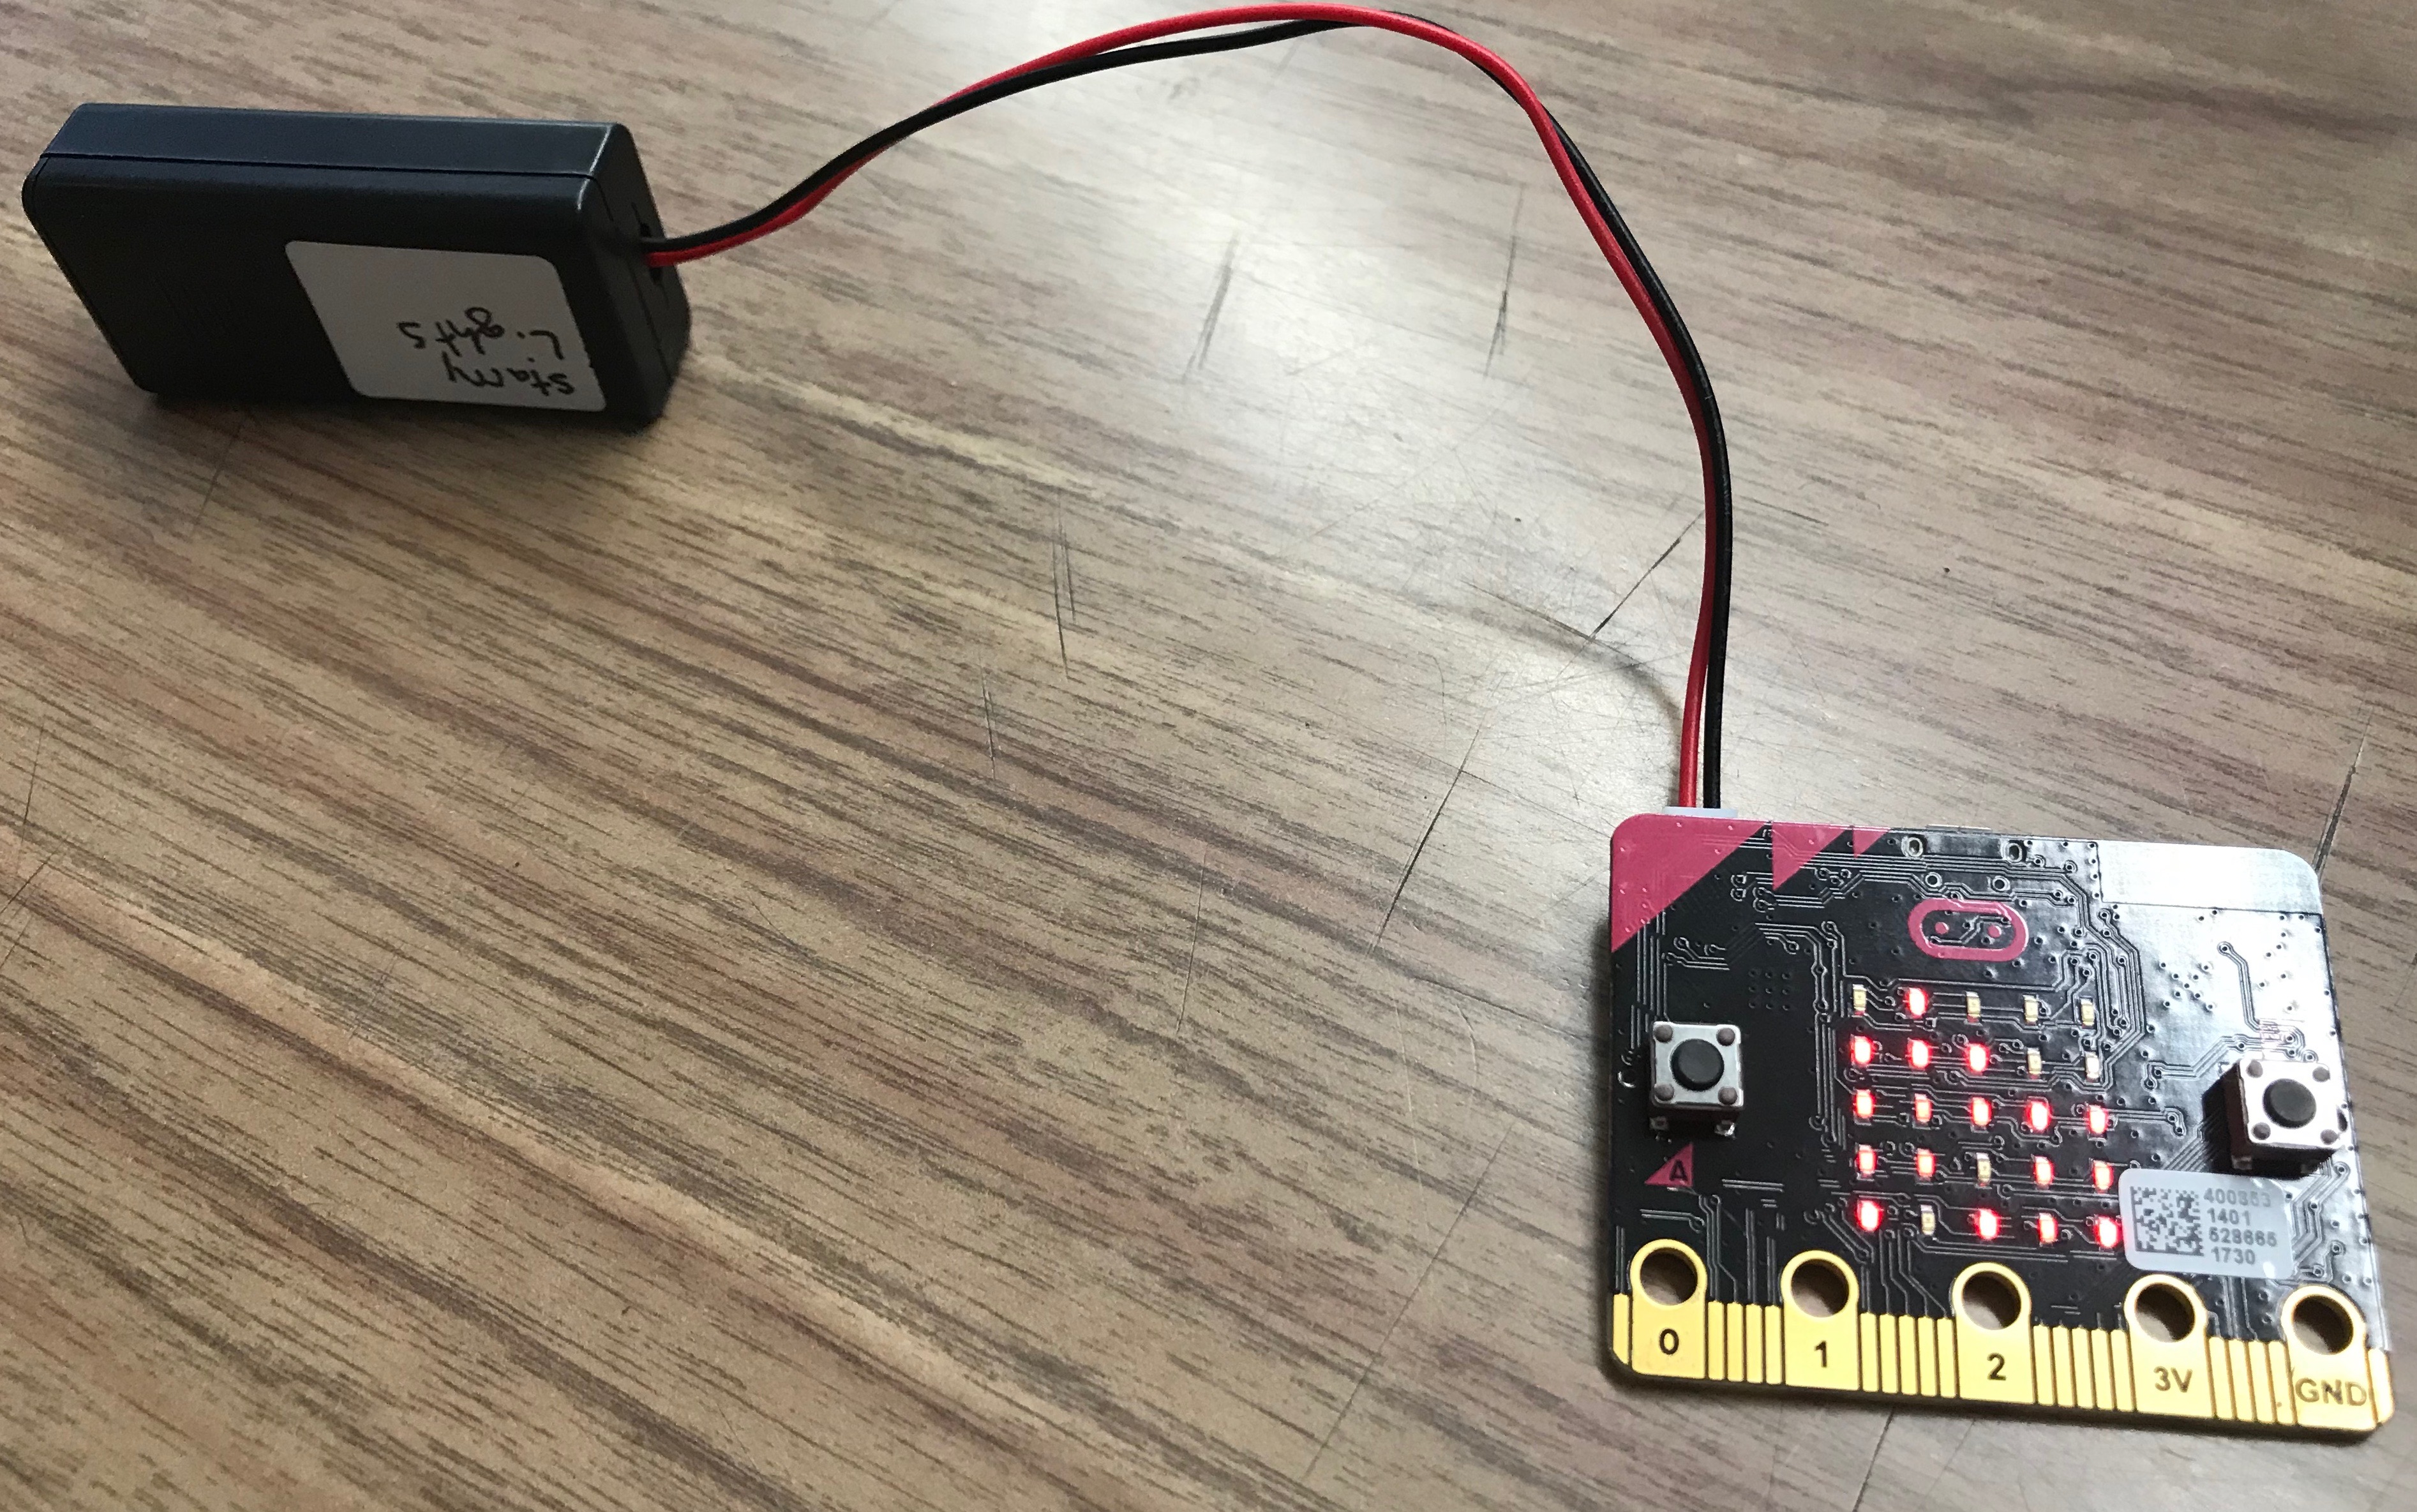
                                                                                                                                 This is the microbit connected to a battery pack.

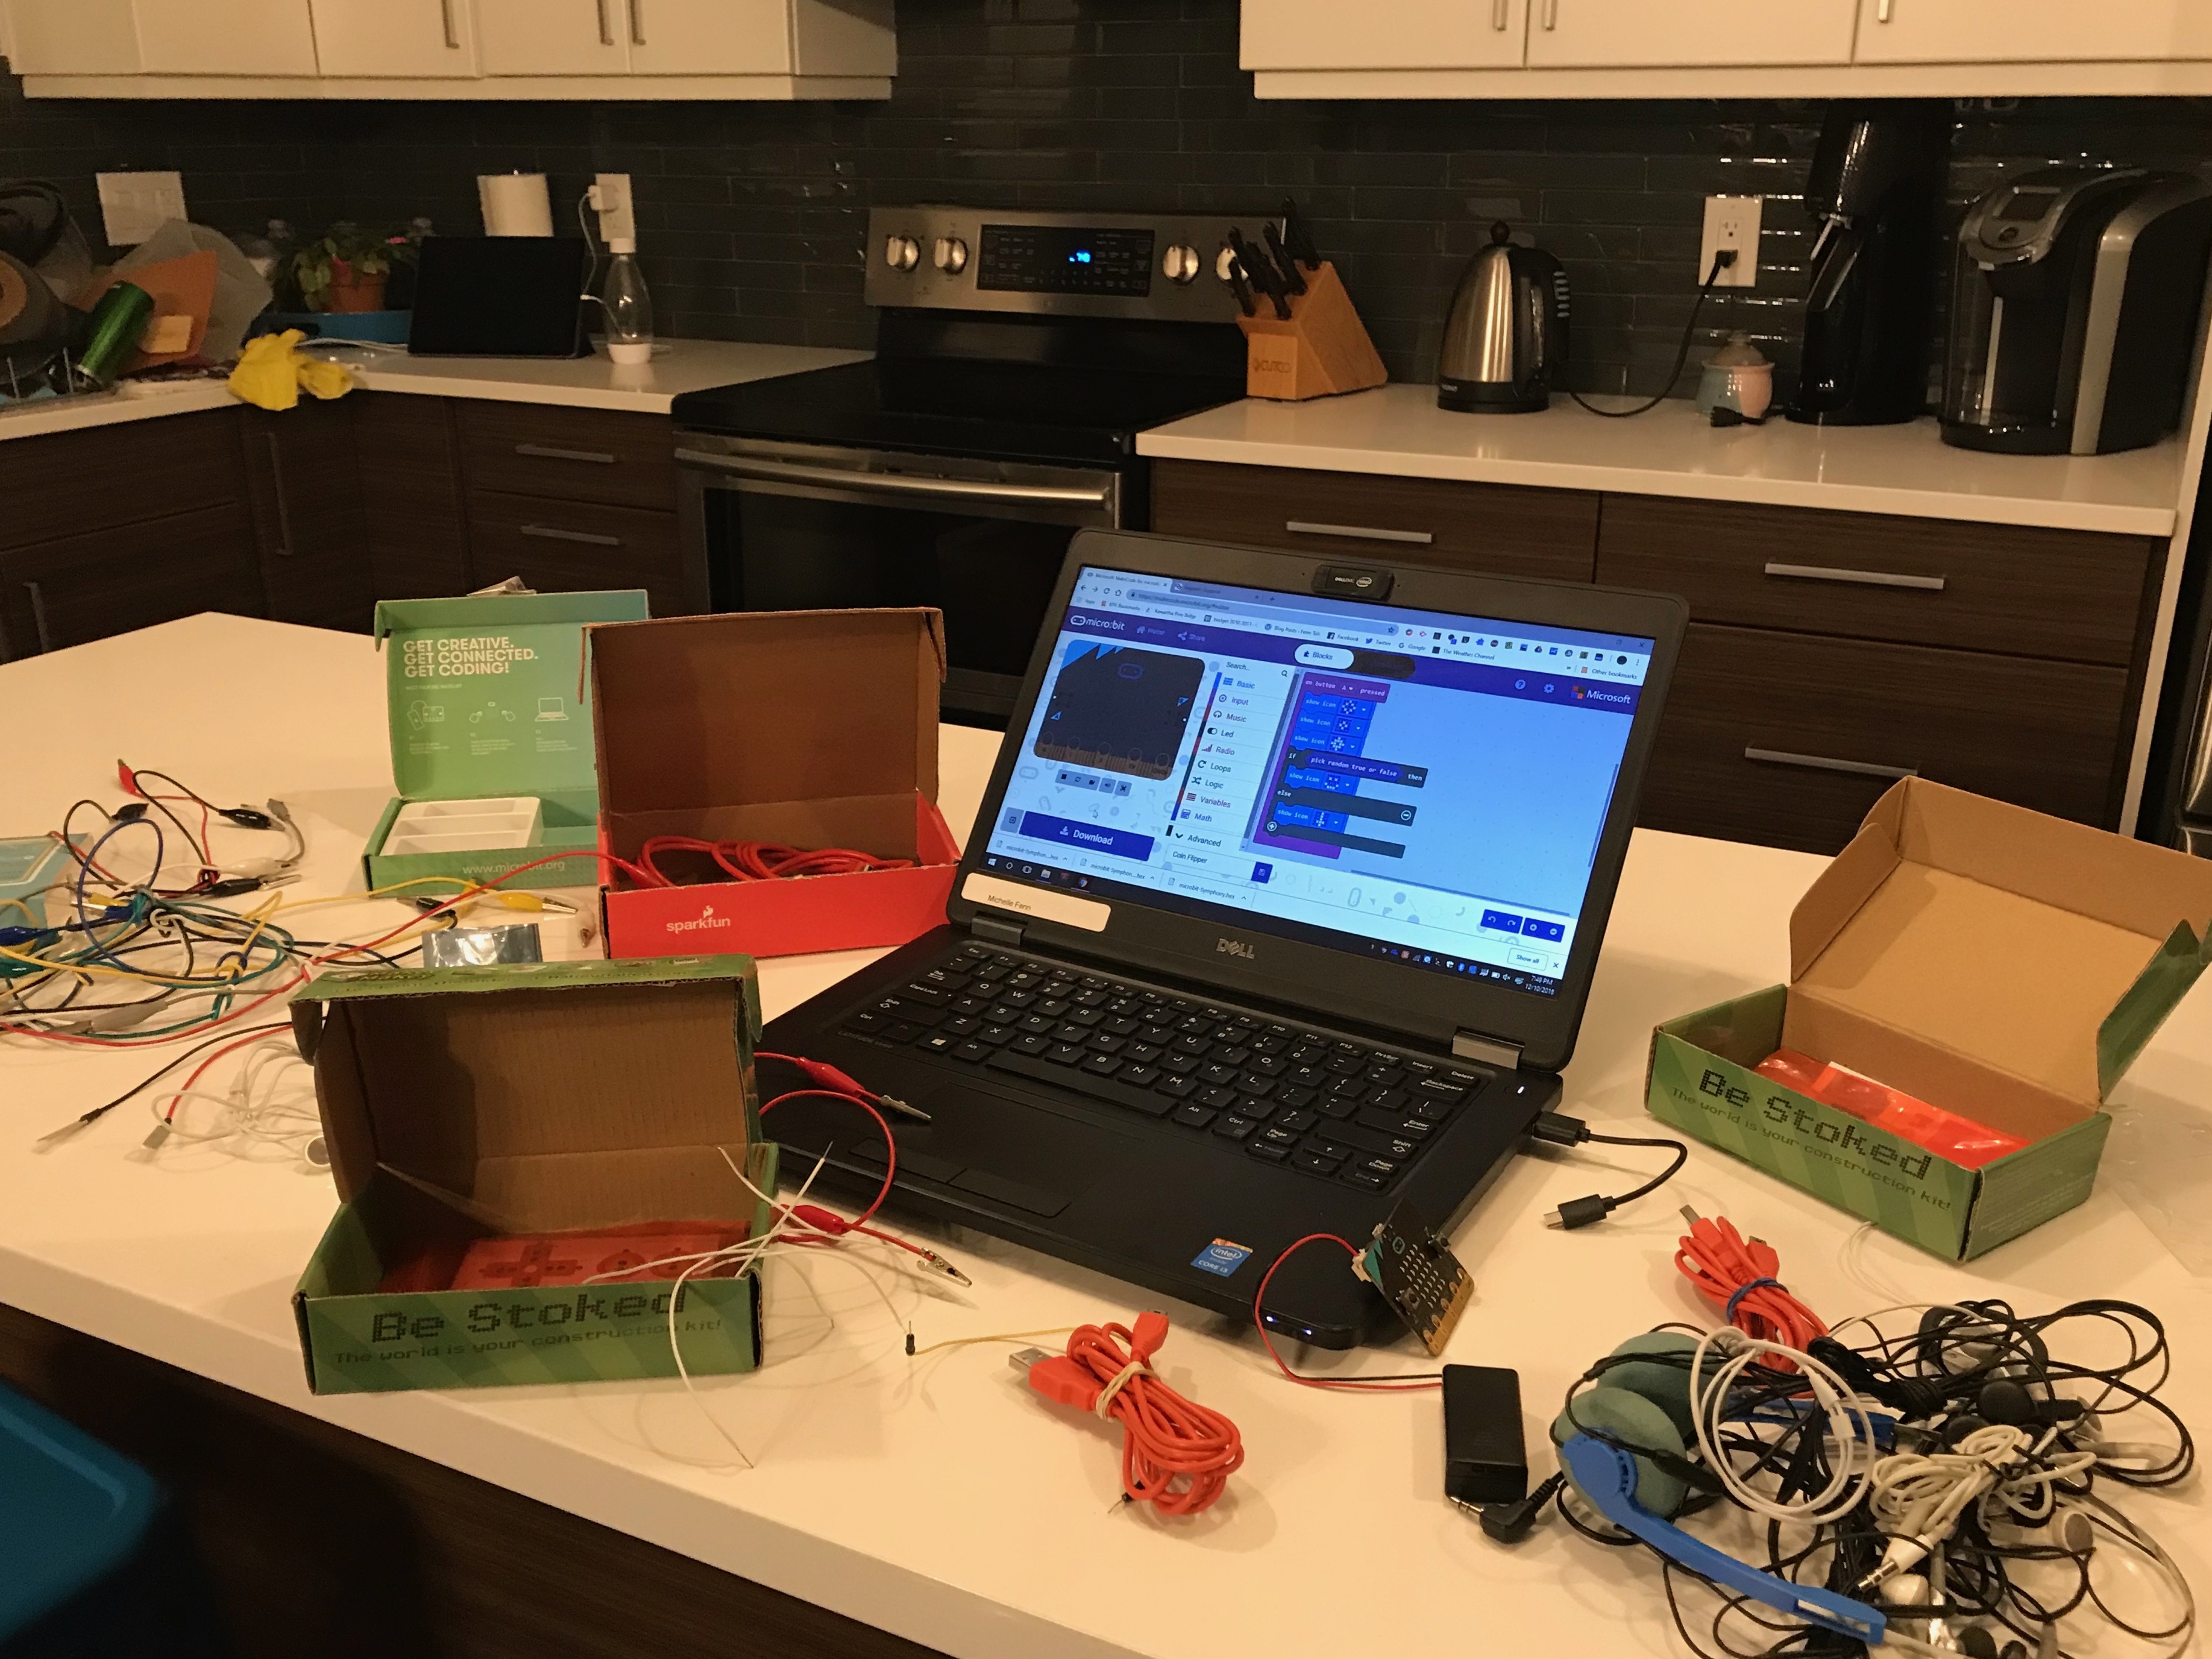
Kids Code Jeunesse provided me with training and as part of my job as an innovations consultant, I now go into classrooms within my school board to deliver workshops to students.  The only coding that I had done up to this point was with Spheros and Ozobots which was quite rudimentary.  I am now immersed into the coding culture. Which means that sometimes my kitchen counter looks like this:

IMG_6320 It was a little out of my comfort zone to be sure.  As I have gone into classrooms I have admitted to students that I’m not an expert on microbit   technology and I have learned from some of the students that have been engaged in complex coding on their own time.  With a quick conversation with   the classroom teacher I can usually make some decisions around differentiating the program to keep students engaged.

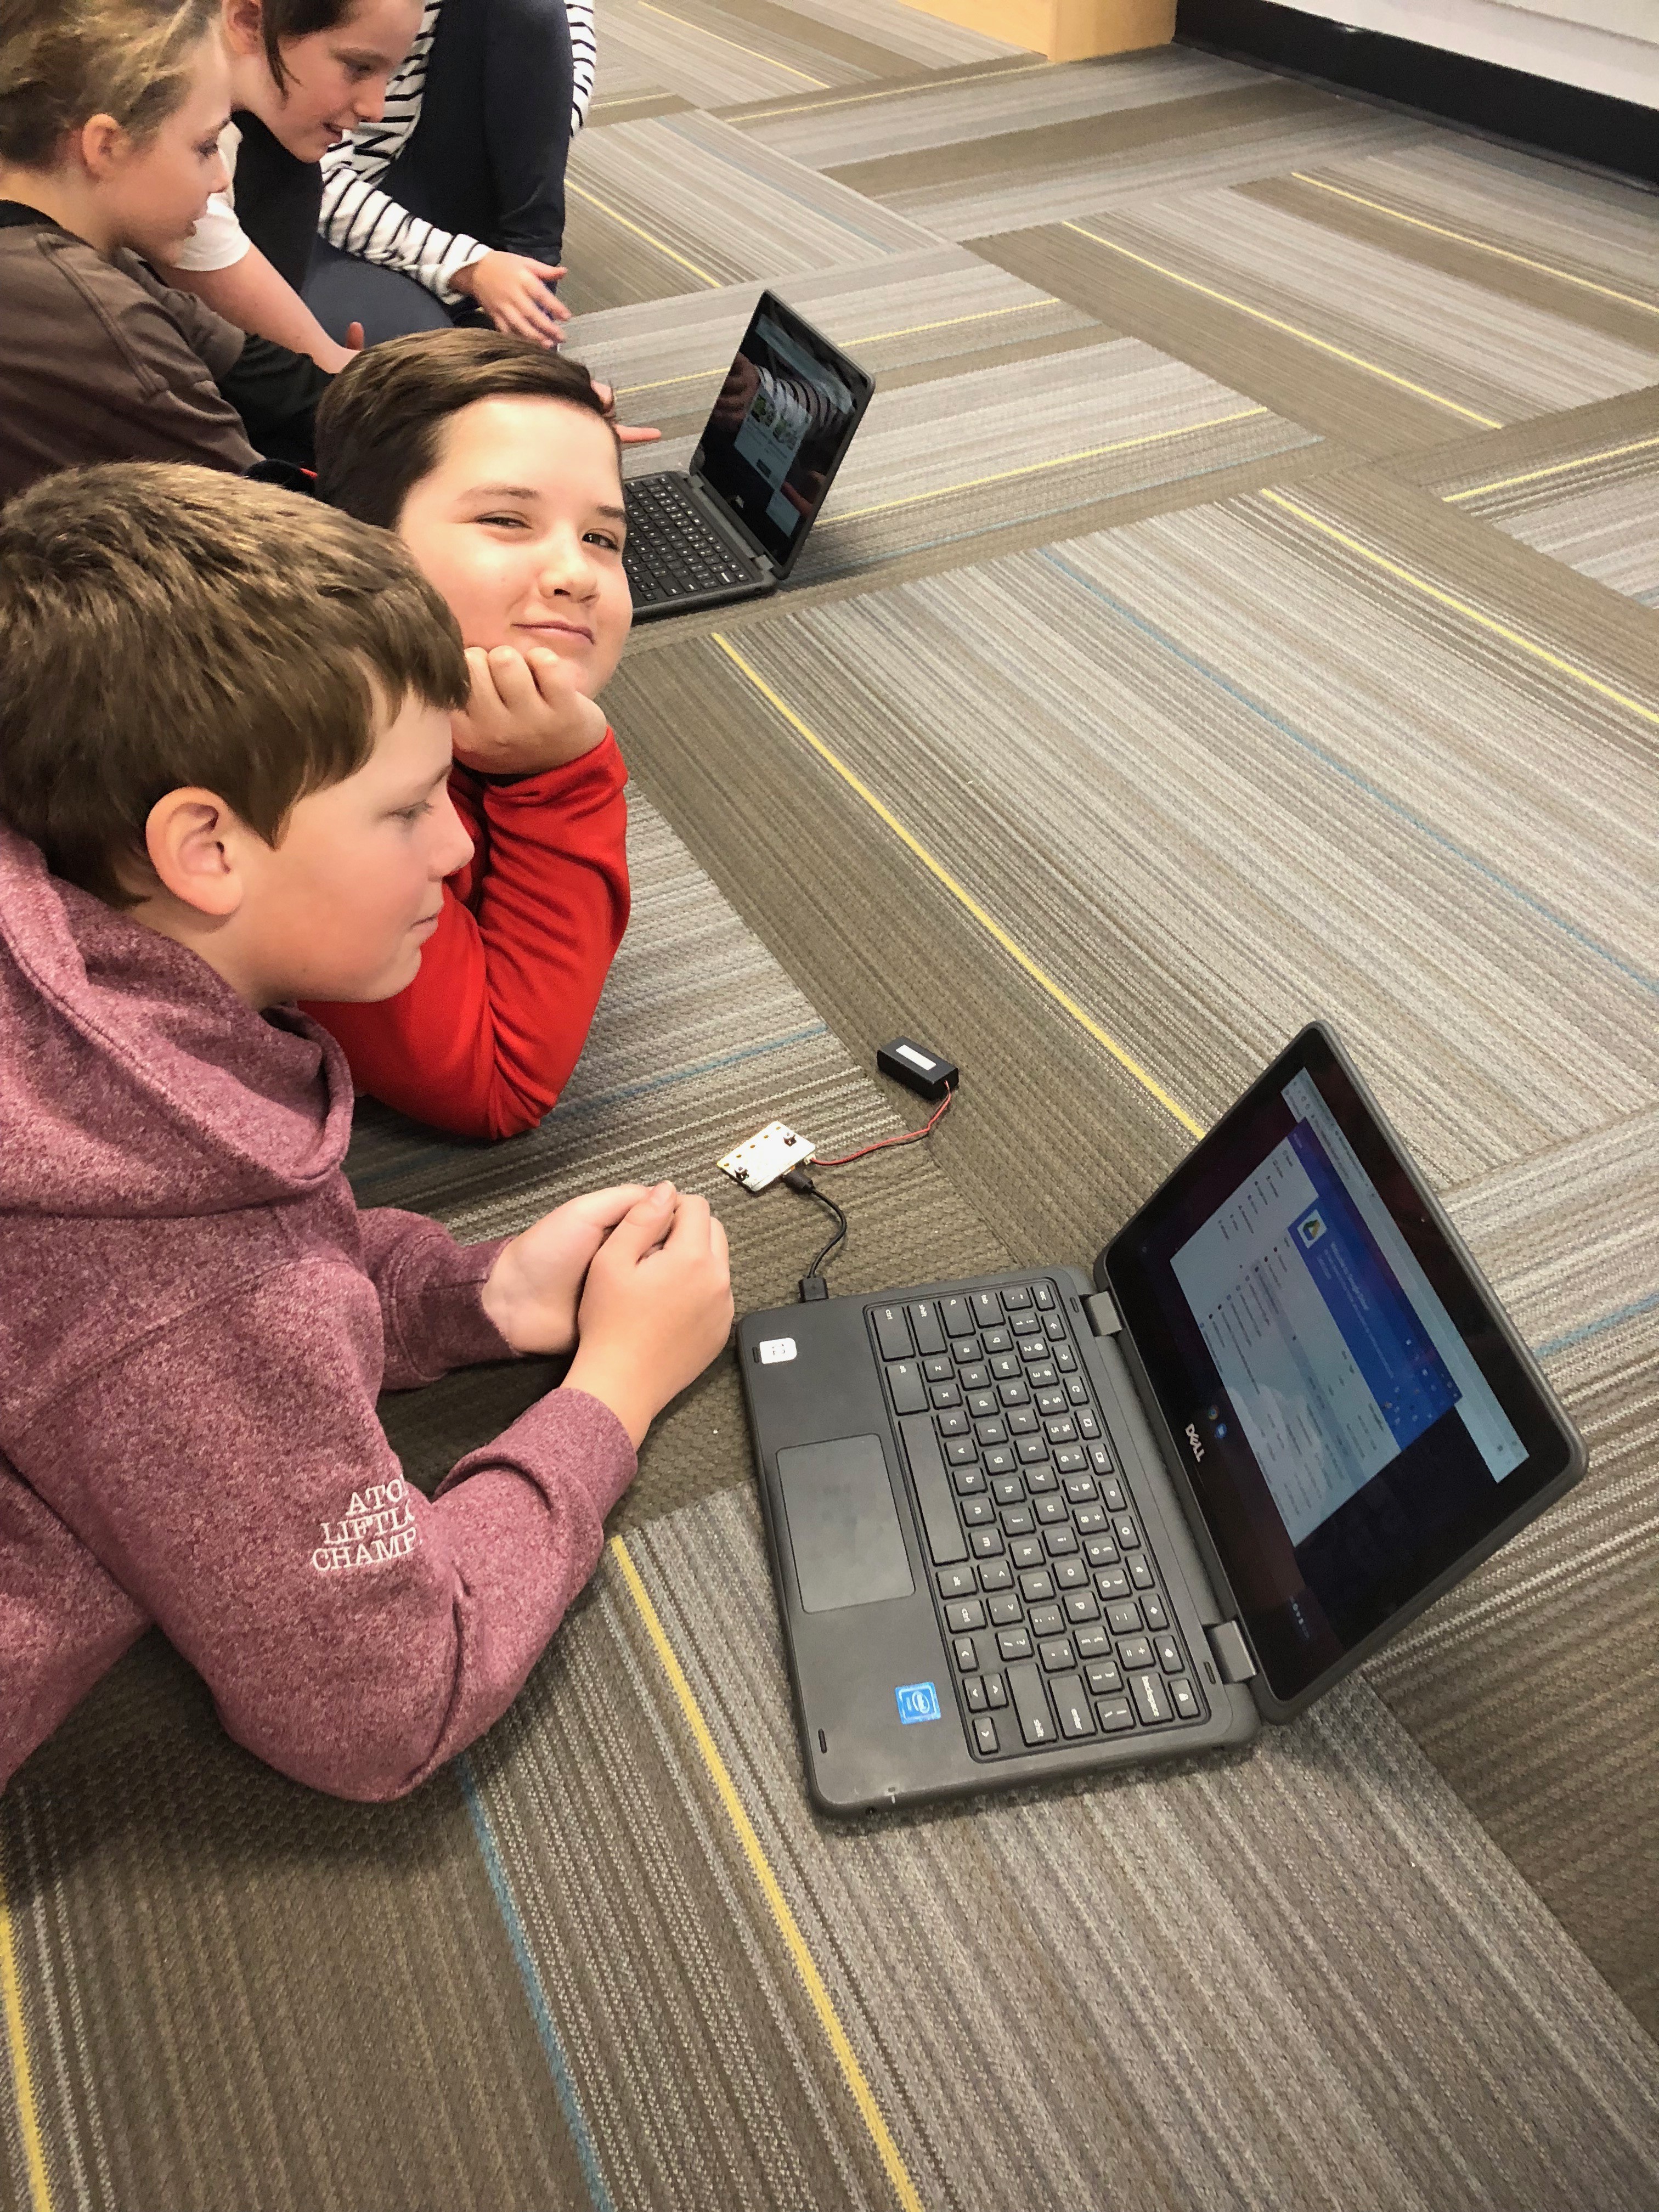
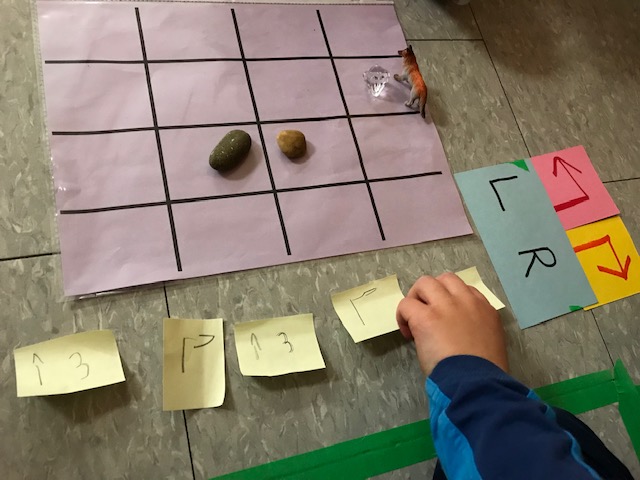
 You might be wondering what it is these little computers can do.  The LED lights on the front can be programmed to light up in patterns which create   animations.  Students can create dice or rock, paper, scissors games and with a few alligator clips and a small speaker or headphones, microbits can be   programmed to create music. With a little innovation and some adaptation it can be programmed to water plants automatically or become a pedometer.   It can also be paired with a robot called K8 which can be purchased from Inksmith and assembled.  The microbit website itself is where the coding takes   place and it has easy to follow tutorials and ideas for projects to code.

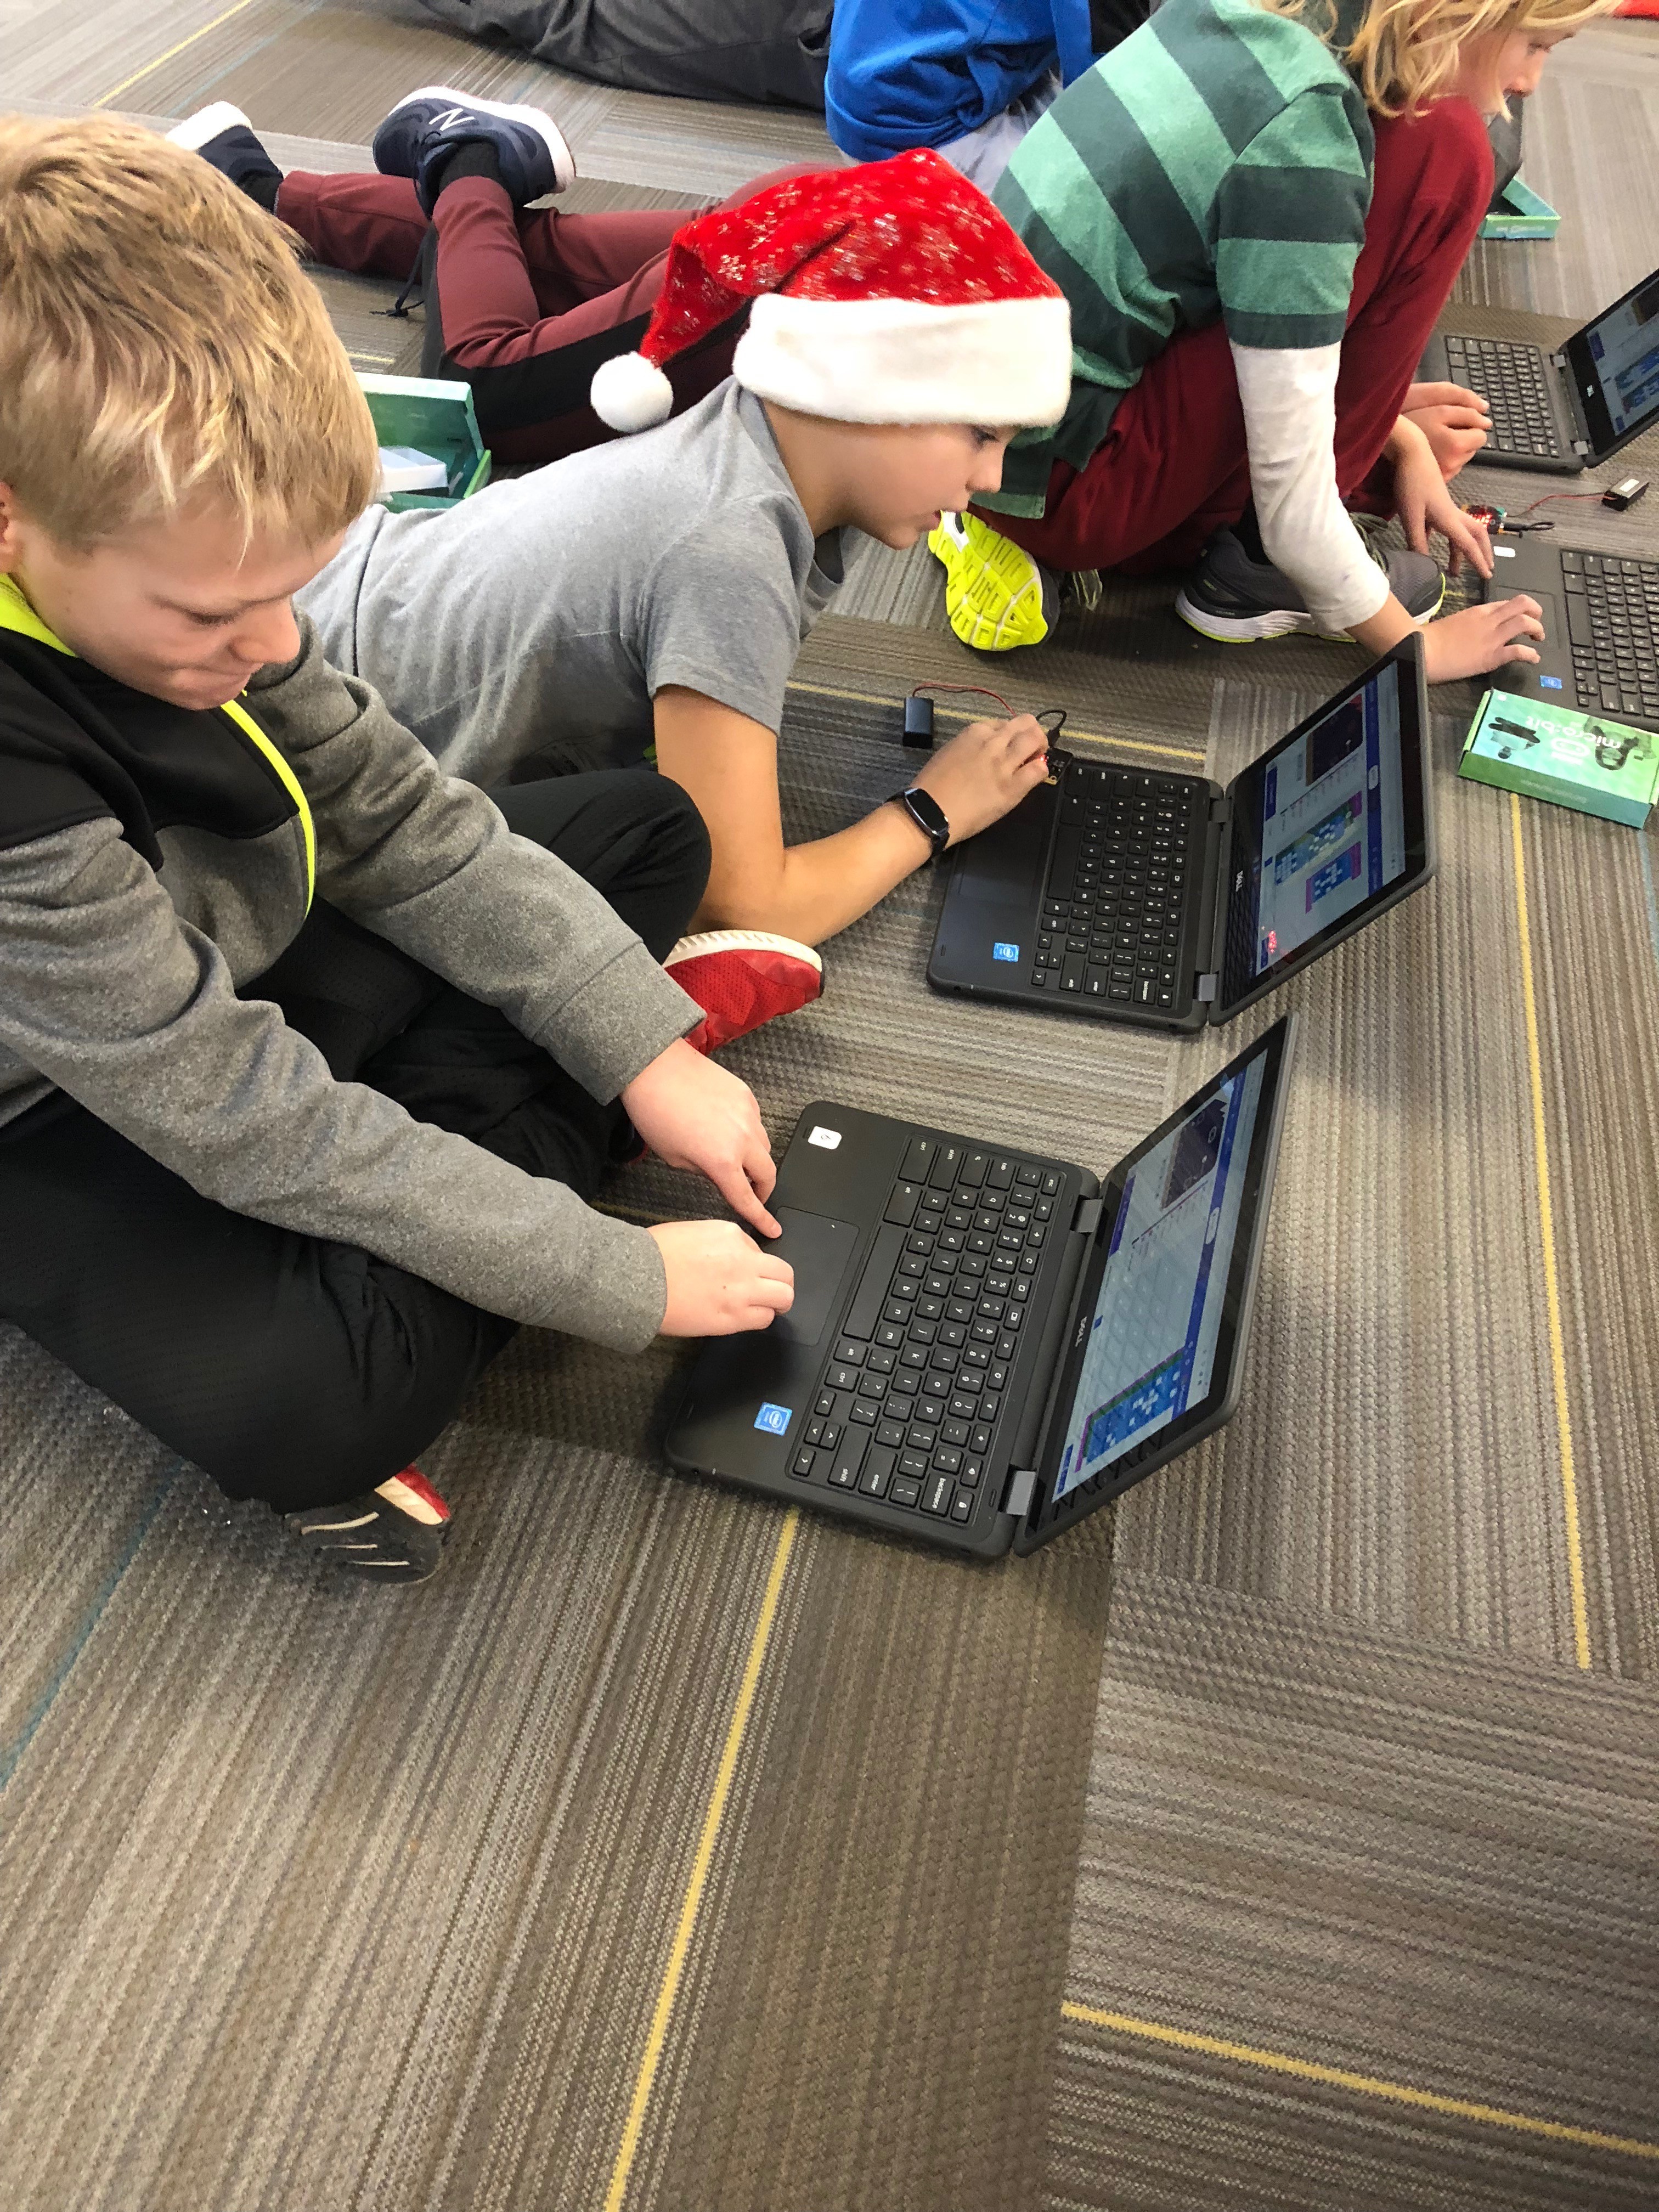
The initial workshop is only the beginning.  The only limit to these little computers is the limits of your student’s imagination.  Microbits would be incredibly useful in a maker space or genius hour environment.  The students develop design and critical thinking skills and problem solving techniques as they create and de-bug programs.  It is an amazing way to introduce coding to students-especially if you are a teacher who is brand new to coding.  Be warned: coding is extremely engaging and you and your students may have an inordinate amount of fun while learning.

         IMG_6350IMG_6200IMG_6358IMG_6326IMG_6356

A smiling cat

The Almighty Meme

My teenage son is obsessed with memes. I remember my friends and I at his age, randomly quoting lines from John Hughes or Monty Python movies which confounded the adults around us but my friends and I would collapse into hysterics.  I am now the confounded adult but instead of movies, the quotes are from internet memes and vines.

As a teacher I always seek to leverage whatever is important to my students in order to make language engaging and authentic.  Last year I used their interest in Snapchat and connected it to “book snaps” in order to synthesize information about what they were reading.  Over the holidays I played a game called, “What do you Meme?” which is an adult version of “Apples to Apples” but with pictures.  Although the content was rather explicit (obviously not to be used in a classroom) and more than a little embarrassing to play with my 86 year old mother, I got to thinking afterwards about the language processing that it took in order to play this game and how could I turn it into an engaging teaching opportunity.  The idea around the game itself is rather simple, choose what you consider to be the best “caption” for the meme (photo) and then another person chooses their favourite of those put forth by the  players.  The idea is to make it “relateable”.

I realized that there was a great deal of inferring going on while we were matching the statements to the pictures.    We had to read the facial cues, look for other clues in the picture and then also relate what was happening in the picture to some kind of an emotion or shared human experience.  I’ll give you an example.

   smiling-cat-14104597394GP

“When you have beaten your big brother to the last piece of chocolate cake.”

In order to come up with that statement, I had to make some decisions.  I really had to think about the photo and determine what was happening. For me, it looked as though the cat was laughing and feeling rather satisfied with himself.  Then I had to think of something that would cause that reaction in someone to which other people might relate.  It is rather complex thinking.

In the classroom before any writing would take place I would provide many examples of popular (and appropriate) meme photos that are being used in different ways and discuss these with my students over a period of time.  What makes it funny or something with which people can relate?  What about the human experience is being shared in this meme?

Then I would provide a photo something like the one above on the Smartboard for students at the beginning of the language period. Just one at a time at the beginning so that we can take the opportunity to break down the thinking.  Students could then invent their own statement for the photo and justify their idea when they share it with others. In order to scaffold for some students, I might provide a variety of statements like the game itself and have them choose and justify their choice.  Students could also take or choose their own photo and create their own memes using apps such as Canva or Pic Collage.  This could also lead to an authentic digital citizenship opportunity with how to search and use photos that are public domain. In addition, these memes could then be shared on a class blog or social media to receive comments from others which provides feedback to students on their creations.

To take the idea of the memes further, the students could then use them as story prompts and create a narrative around the meme.  I might also ask the students to create some memes like book snaps which relate to the books that they are reading. See the example below:

smiling-cat-14104597394GP

“When Fudge ate Dribble.” 

Tales of a Fourth Grade Nothing-Judy Blume

A meme that needs an explanation isn’t a good meme, just like you shouldn’t need to explain a good joke.  There is a kind of sophistication in the thinking process involved in the creation of memes and they connect us as human beings.  Memes are this generation’s political cartoon, headline in the newspaper or funny birthday card from “The Far Side” creators; a visual paired with words that connects a shared human experience.  Know what I Meme?

Robotics and Coding in Action

Reflections and Observations from Robotics/Coding classes…

While currently working for several days on coding plus Lego robotics in three math classes: two grade 5/6s and one grade 7/8 class, I had the most interesting experience on a recent Friday.

An assumption, as the technology leader and I were planning out the lessons and build, was that many students would get a lot of satisfaction from building the robots, before coding them. So we had the whole first day where they built the Express Bot and then dismantled them so the next group could build. It was ok… but still some bickering, and such.

The next day was completely focused on learning how to code the robots.

It was like turning a switch on. The focus, engagement and successes were amazing. Not a single behavioural issues. The one class has math every day during the final hour of school. Half the time it is a challenge to manage this class. Many of the students are identified and probably more will be in the future. These students achieved as much as the other classes, and more. They were totally immersed in their tasks and goals. They were super excited to share with each other, help each other, share with the teachers and principal. They did not want to go home when the bell rang. We were basically speechless at the end of that class, due to the changes we had seen.

Other teachers were walking by to look on in amazement as the class exhibited the kind of learning skills and focused behaviour that was not usually observed. The students were collaborating and creating their own projects. Natural differentiation was created when working with these groups, especially as it was not guided instruction. Activities like this fill me with joy to see the success of many.  Today’s students,  tomorrows technology experts.

Global Read Aloud – Join In!

Over the past few weeks, my class has been participating in the FSL-centric version of the Global Read Aloud, an international event where classes all around the world read the same books and share their learning over social media. Some teachers choose to connect directly with other classes, some simply share their activities online for others to see, but all are engaging with the digital community in some way.

My class has really enjoyed participating in this event. It was entirely teacher led, initiated by Tammy Aiello of Teaching FSL. The official iterations of the GRA are designed for either English programs or French-first-language programs, making it challenging to engage with the event if you teach an FSL program of some kind. Thankfully, there were enough of us interested in working out the details that Tammy was able to coordinate book lists for all ages (based on teacher input!).

If you haven’t participated in the GRA before, I strongly recommend it. While my teaching assignment and personal life meant that I couldn’t delve as deeply into it as I would have liked, even the small taste my students had of engaging with the online world had them eager to do more. More importantly, though, we chose books with deep meaning and strong curriculum connections. For my age range (Junior French Immersion), the books were about Indigenous issues, LGBTQIA issues, infertility, immigration. We had many valuable conversations in the class about history, human rights, and moving forward with a more open mind. These are not easy issues to tackle, by any stretch, but the books served as rich starting points for these topics of incredible importance.

I spoke so animatedly about what my class was doing that another teacher joined in. This gave us the opportunity to share resources and ideas, compare student engagement, and co-plan. We both realized that we really loved the format of diving deep into one picture book a week, as it opened a lot of cross-curricular doors and made for great teaching. It’s changed my teaching for the last six weeks – and may well change my teaching for the rest of the year.

If you’re interested in finding out more about the Global Read Aloud, you can check out the website here. If you’re an FSL teacher, our Facebook group is here. The event is officially over for the year, but you can always start it up in your school and go through the book(s) a few weeks late! Otherwise, see you in September 2019!

Gaming…safely?

We have been trained to watch for concerns of a child’s well being. This didn’t include cyber information. As a responsible teacher I’m drawing the attention of students to current events. During this time of sharing, my students have become more relaxed and open about their after school activities which include gaming for many.

When a child discloses information about their safety we are obligated to report this to children’s services. Write down the facts, call and make a statement, fairly straight forward.

When a child shares information about interactions in Gaming, what do you do? I make a judgement based on what the information is, then I write down the facts are that were shared, then what? I’m really not sure where we go from here. I call the family and have a conversation? I chat with the principal? I provide the student with avenues of help, help lines, internet safety….

This is a new world which effects all of our students. Access to our vulnerable young students is wide open on the internet especially with group gaming and social media. Education is a form of protection. When a child is doing something their family may not agree with, they are reluctant to share concerns and can easily become victims of online abuse. How do we help? Keep open communication lines with students and their family. We all want our children to be safe.

Introducing Coding without Robots

A few years ago when I started hearing about teachers doing coding and robotics in the classroom I dismissed it as a fad.  I didn’t understand the value of coding nor could I see how it tied to the curriculum.  However, I recognize as a professional learner my initial reaction to something radically new can sometimes be resistance.  I think that this is because I can’t see myself fitting “one more thing” into my classroom practice. I always have to give myself time to process, research, find the value and then finally accept it.  After I have tried a new practice with students and see the beneficial outcomes, I endorse it and then begin to share it widely with colleagues.

When I began the journey with coding and looked at code.org I tried it on my own and admittedly, understood very little. I went to more workshops and conferences but avoided the coding and robotics thinking that it just wasn’t my bag.  Then I had a colleague that dragged me in to the world of coding and robotics.  We worked together.  I’ve since become convinced that we need to teach all students how to code.  I have also figured out that you don’t need any robots to do it.  In fact, when you start-you don’t even need a computer.

coding 4         coding 2


The above picture is a coding game that I used recently with a grade one and two class.  Students placed their obstacles (rocks) on a grid.  They placed their “gemstone” or finish on a spot on the board and their “robot” (animal)  on another spot.  They wrote their code on a sticky note using arrows and then had their partner take their robot through the code to test it for “bugs”.  A big part of coding is knowing your left from your right and being able to write instructions that someone else can follow.  We started out the day coding one another to walk in a square using only: “forward” “turn left” and “turn right”.  It was amazing to see how much problem solving took place.  They were using positional language, procedural writing, clear communication, visualization and proportional reasoning.  Their thinking was exploding! The students were engaged in the learning and well on their way to being able to code something online.  From there we explored the Scratch Jr. app.  After a short look together at what the different “buttons/blocks” meant they were able to code independently.  As teachers we sometimes get bogged down in the fact that we don’t have the money to purchase the technology and shy away from trying things based on the fact that we don’t have “the stuff”.  However, laying the groundwork before introducing the technology piece to students is key.  We need to always consider the pedagogy before the technology.


Google Forms as Pedagogical Documentation Tools


I really love using Google Forms for anecdotal notes (something like this). I hate having to keep track of sticky notes, photos/samples of student work, class lists with comments, etc. and then try to make sense of it all come report card time. A few years ago, I was introduced to the magic of Google Forms at a tech workshop, and I immediately jumped in. Since then, I’d say that the most common tech question I’m asked as my school’s digital lead is, How do I set up pedagogical documentation with Google Forms?

So… here I am with a tutorial! Fair warning: this post is photo-heavy because I’ve provided screenshots throughout.


Step One: Create a New Form


forms tut 1


Open up Google Forms and hit the “Blank” button under “Start a new form”. You should end up with something like this:

forms tut 2

Step Two: Change the Title & Add Student Names

Set the title (blue arrow) to something you’ll remember. If you have multiple classes, you should include the class name in the title. Then name the first question “Student Name” and select dropdown from the menu to the right (red arrow). Time-saving tip: if you have an electronic class list file, you can highlight a column of student names, copy (ctrl + C), and paste the names into the response field for the question. It’ll populate the list with all of the names from that column.

I recommend setting this question as “Required” (black arrow) so that it won’t allow you to complete the form without selecting a student.

forms tut 3

Step 3: Create the Learning Skills (or Subject) Question

Your next question should be where you select which learning skills and/or subjects you are commenting on. I like to set this question to a checkboxes response style (black arrow) so that I can select multiple learning skills/subject areas when appropriate. I often set this question as “required” as well.

forms tut 4

Step 4: Create the Comments Field

Next, you want to create a place for you to type in your observations. Google Forms is pretty intelligent and automatically selects paragraph as the response style when you name the question “Comments”. Paragraph simply means that when you open up the form, it’ll give you a large field to type into. I recommend paragraph over short answer so that you don’t hit a character limit. I recommend setting this question as required, since it’s… you know… kind of the point of the form. 

forms tut 5

Step 5: Create a File Upload Question (if you want)

I always include a “file upload” option with my anecdotal forms so that I can attach samples of student work (scanned work, photos, files from Drive). It can be really useful if students are doing group work, hands-on activities, or work that is otherwise hard to keep around. Also useful for keeping your piles of student samples to a minimum!

When you first select “File Upload”, you’ll get a notice like this, and you just need to click “Continue” (black arrow):

forms tut 6

Then your question should look like this:

forms tut 7


I don’t play around with the options there, personally. I like to leave it open and flexible.

Step 6: Set Your Form to Collect Responses in a Spreadsheet

This is one of the best parts of Google Forms: if you ask it to, it’ll collect every response you submit in a spreadsheet, where you can access ALL of your anecdotal notes in one place. You can sort by student name, learning skill, whatever. Responses will be date/time stamped, so you know when you made the observations. You definitely want to do this.

To set your form to collect responses in a spreadsheet, first select “Responses”…

forms tut 8

Then click this little green button (the Sheets icon)…

forms tut 9

It’ll pop up with a window that looks like this…

forms tut 10

And when you hit “Create”, it’ll take you to your new spreadsheet, where responses will automatically be added as you submit them! It’ll look something like this:

forms tut 11


That’s it! You’re done! Your form is now ready to use. 

Final suggestions:

  • Bookmark it and add the bookmark to your bookmarks bar for easy access.
  • Share it with teaching partners so that all of your observations are in one place.
  • If you use Google Classroom and have multiple classes, make the header for your form the same as the header for Google Classroom so that you know you’re in the right one.

Hope some of you out there found this useful! If you’re looking for a more visual/simple way to track student work and learning skills, especially those in Kinder and Primary, consider using Google Keep instead of forms.


My Yearly Notebook

Each summer I buy a brand new spiral bound notebook.  Not the skinny ones that you get in the 3 pack from Hilroy with the flimsy cover that rips within a few uses. I am particular about my stationary.  It may be a kind of a problem.  I get the 8 1/2 by 11 solid cardboard spiral bound notebook.  It is where I keep my lists.  Lists of things to buy for the classroom.  Lists of things I want to change in the physical space of my classroom.  Lists of books I’d like to read or add to my classroom library.  Lists of things to get done before September.  Lists of the curriculum topics I’ll be teaching and in what months I plan to teach them.  Lists of special events each month that I might highlight or celebrate with my students.  Lists…of lists.  I use that big notebook all school year long to add notes from meetings, professional development sessions and of course, more lists.  I have many already filled spiral notebooks of new ideas that I’d like to try over the school year on my shelf in my office.  This summer I realized something.  After the school year is over I have NEVER opened those notebooks again.  There are lots of great ideas in there that I didn’t implement and then I feel guilty about that!  Teacher guilt never seems to stop, unless of course, I choose to stop it.

This summer I quickly read the book, “Ditch That Textbook; Free Your Teaching and Revolutionize Your Classroom” by Matt Miller. It has fantastic teaching tips for technology integration in the classroom.  Although I do not have the desire nor the access to the 1:1 technology to go completely paperless, I found a lot of wisdom and great teaching tools in Matt’s book.  I have also provided a link to Matt’s blog.  Matt helped me to break a cycle.  I haven’t bought a spiral bound notebook this summer and I’m not planning on buying one.  Among many pieces of advice in the book, Matt suggests picking two new things that you are really excited about to add to your teaching practice, being clear about your intention for using those practices and following through.  I’ve been guilty of overdoing the professional learning to the point that I overwhelm my students by doing a whole bunch of new things all at once and then don’t end up sticking to any of them.  I also get overwhelmed by the many great ideas out there and wonder if I do something else, what I’ll have to give up doing.

I’ll admit that I’m already kind of cheating.  Instead of just choosing two teaching practices I’m also choosing two new technology platforms to learn about for next year.  One of the practices that I would like to get in the habit of doing is adding more descriptive feedback to assignments that students do online and have multiple opportunities for the students to respond to that feedback and re-submit assignments with changes.  The second thing that I would like to do is educate parents on how to leave constructive feedback for their students online rather than a thumbs up or “Good job!”  I plan on exploring the video and audio creation tools, WeVideo and Voki.  I may explore more than these but these are the ones that I am committed to doing.  Since I have written my commitment here on the blog, I also commit to sharing what I thought about those tools in a review format.  If you get a chance to read Ditch That Textbook, I highly recommend it. It is a quick read with great already-made lists and hey, it made me “Ditch That Notebook”.


Why Coding Is Important Part Two

In Part one of this blog post I talked about coding with relation to the deep learning competencies and learning skills.  However, there are greater implications of teaching kids to code.  I am a huge science fiction and dystopian fan.  I think I am attracted to the resourcefulness of the characters in the movies and books.  The characters that have hands-on life skills and leadership qualities are valued and survive.  Let me be clear, I do not view the classroom as a dystopian or science fiction society…well…unless we are suffering from a severe heat wave.  I think that understanding the way the technology on which we rely on a daily basis, is a skill worth exploring.  That understanding also builds an appreciation of the work of coders and others in the computer science industry.  After taking 20 minutes to code a square with a small spherical robot a student said to me, “Wow. Can you imagine how much time it took to code everything in FortNite? Every step my character takes, everything it wears or every background must be lines and lines of code.”  That was a pretty serious revelation for a 9 year old.

It isn’t science fiction that there is a huge demand for computer science programmers and developers.  According to Code.org, 71% of all new STEM (Science, Technology, Engineering, Math)  jobs are in computing, yet only 8% of STEM graduates are in Computer Science.  According to the employment website Indeed.com there are currently over 2500 full time job openings in the greater Toronto area in the field of Computer Science with annual salaries between $60,000 and $140,000.  Learning to code increases the odds of securing a lucrative STEM career, especially in a world where computing jobs are growing exponentially. Coding has quickly become a vital skill in the work world.  Elementary teachers can begin to open doors for students by exposing them to coding in a fun and interactive way.  It is safe to say that coding language will develop into something much different before our students get into the workforce.  It isn’t about the “content” or “language” of code.  It is about teaching them a new way of thinking that they could apply to any coding language or problem solving situation.  According to Code.org, many colleges and Universities are looking for experience with coding on entrance applications.  It is difficult to ignore the statistics.

With Alexa, Google, and Apple in homes, cars, pockets and on wrists we know that this our reliance on computers as a society isn’t going away soon. Exposing students to these new learning opportunities to develop their deep learning competencies is necessary for development as learners and in the end, may prove quite lucrative for their futures.


Why Coding is Important Part One

I consider myself a fairly techie teacher.  However, until recently I hadn’t really tried my hand at coding or robotics.  Well, I had, but I had lost interest as I quickly felt as though I was out of my depth.  So, I did what I always do when I really want to learn something about teaching, I go to a colleague that has the knowledge and I try it WITH the students.  Collaborative inquiry.

Until recently, I didn’t see what the big deal was or why it was important to teach coding to students.  Yeah, playing with robots is fun but what does that have to do with curriculum?  When I started working with and learning coding along side students I had a change in mindset.  There is a lot of math, strategic planning and visualization in coding. Coding may not always directly relate to curriculum content-that is true.  However, in terms of teaching students about the deep learning competencies, coding is key.  If you aren’t sure what I mean by the deep learning competencies; they are referred to as the 6 C’s.  Here is a link to the New Pedagogies for Deeper Learning paper but I have extracted a summary of the 6 C’s for a quick reference:

Character: Character refers to qualities of the individual essential for being personally effective in a complex world including: grit, tenacity, perseverance, resilience, reliability, and honesty.

Citizenship: Thinking like global citizens, considering global issues based on a deep understanding of diverse values with genuine interest in engaging with others to solve complex problems that impact human and environmental sustainability.

Collaboration: Collaboration refers to the capacity to work interdependently and synergistically in teams with strong interpersonal and team-related skills including effective management of team dynamics, making substantive decision together, and learning from and contributing to the learning of others.

Communication: Communication entails mastery of three fluencies:digital, writing and speaking tailored for a range of audiences.

Creativity: Having an ‘entrepreneurial eye’ for economic and social opportunities, asking the right questions to generate novel ideas, and demonstrating leadership to pursue those ideas into practice.

Critical Thinking: Critically evaluating information and arguments, seeing patterns and connections, constructing meaningful knowledge and applying it in the real world.

I reflected on these 6 C’s as I wrote the learning skills for my grade 4/5 students this year.  I spend the most time on my reports creating the Learning Skills for each student.  They are personal and they reflect each individual student.  As a parent, it is what I am most interested in reading about my own child.  The 6 C’s are competencies not only for school, but for life.  While students were exploring coding I had them working in pairs or small groups to give them the opportunity to communicate, collaborate and show leadership.  When the code didn’t work, they were able to go back and find the error and correct it and try it again with results right away. Sometimes they found it painstaking and I had to let them work through that and they were glad in the end when I didn’t give them the easy way out and they solved things on their own.  When they learned something in coding, they quickly wanted to share their learning with other students.  I gave basic instruction about the program to start using a youtube tutorial and then let the students go.  Students who often don’t do well in groups with “typical” academic tasks often excelled as leaders in coding because it is a divergent way of thinking and they had a self-check strategy built into the task.  It was incredible to witness the amount of learning that was taking place.

You don’t have to have robots to code.  There are online coding websites that teach kids to code such as code.org and Scratch.  The students even as young as grade 3 are easily able to use these sites to code.  Scratch Jr. is available for younger students.  The sites have great tutorial videos and somehow the students seem to just start discovering and creating things intuitively.  They begin helping each other when they see that someone has created something cool and ask the creator to show them how to do it too.

I am proud to say that I can now code a square, star and a small obstacle course using blocks and a Sphero robot.  My students discover new things every day and share them with me.  It is definitely a new age in teaching.