Whenever possible, I search for ways to integrate the curriculum to create deeper learning opportunities for students and connect to the world around them. It has always been easy to make connections between geometry and art. Measurement and art wasn’t something that I had integrated much before. However, in working with my Teacher Candidate from the Trent University Faculty of Education program, we were excited to see what the students would create. It only goes to show you that when teachers are able to work collaboratively, wonderful programming ensues for students.
We have been working on perimeter and area for a little while, but students were still having trouble figuring out the difference between the two concepts. We started by giving the students 9 square tiles. Students were asked to create a 3 x 3 array of square tiles and determine the perimeter and the area. The perimeter was determined to be 12 and the area determined to be 9. From there, students were given a number of different challenges to reduce the area but maintain the perimeter of 12. The challenges grew increasingly difficult.
1. Reduce the area by one square unit but maintain the perimeter of 12 units.
2. Reduce the area to 7 square units while maintaining the perimeter of 12 units.
3. Reduce the area to 6 square units while maintaining the perimeter of 12 units.
4. Reduce the area to 5 square units while maintaining the perimeter of 12 units.
5. Reduce the area to 4 square units while maintaining the perimeter of 12 units.
6. Reduce the area to 3 square units while maintaining the perimeter of 12 units.
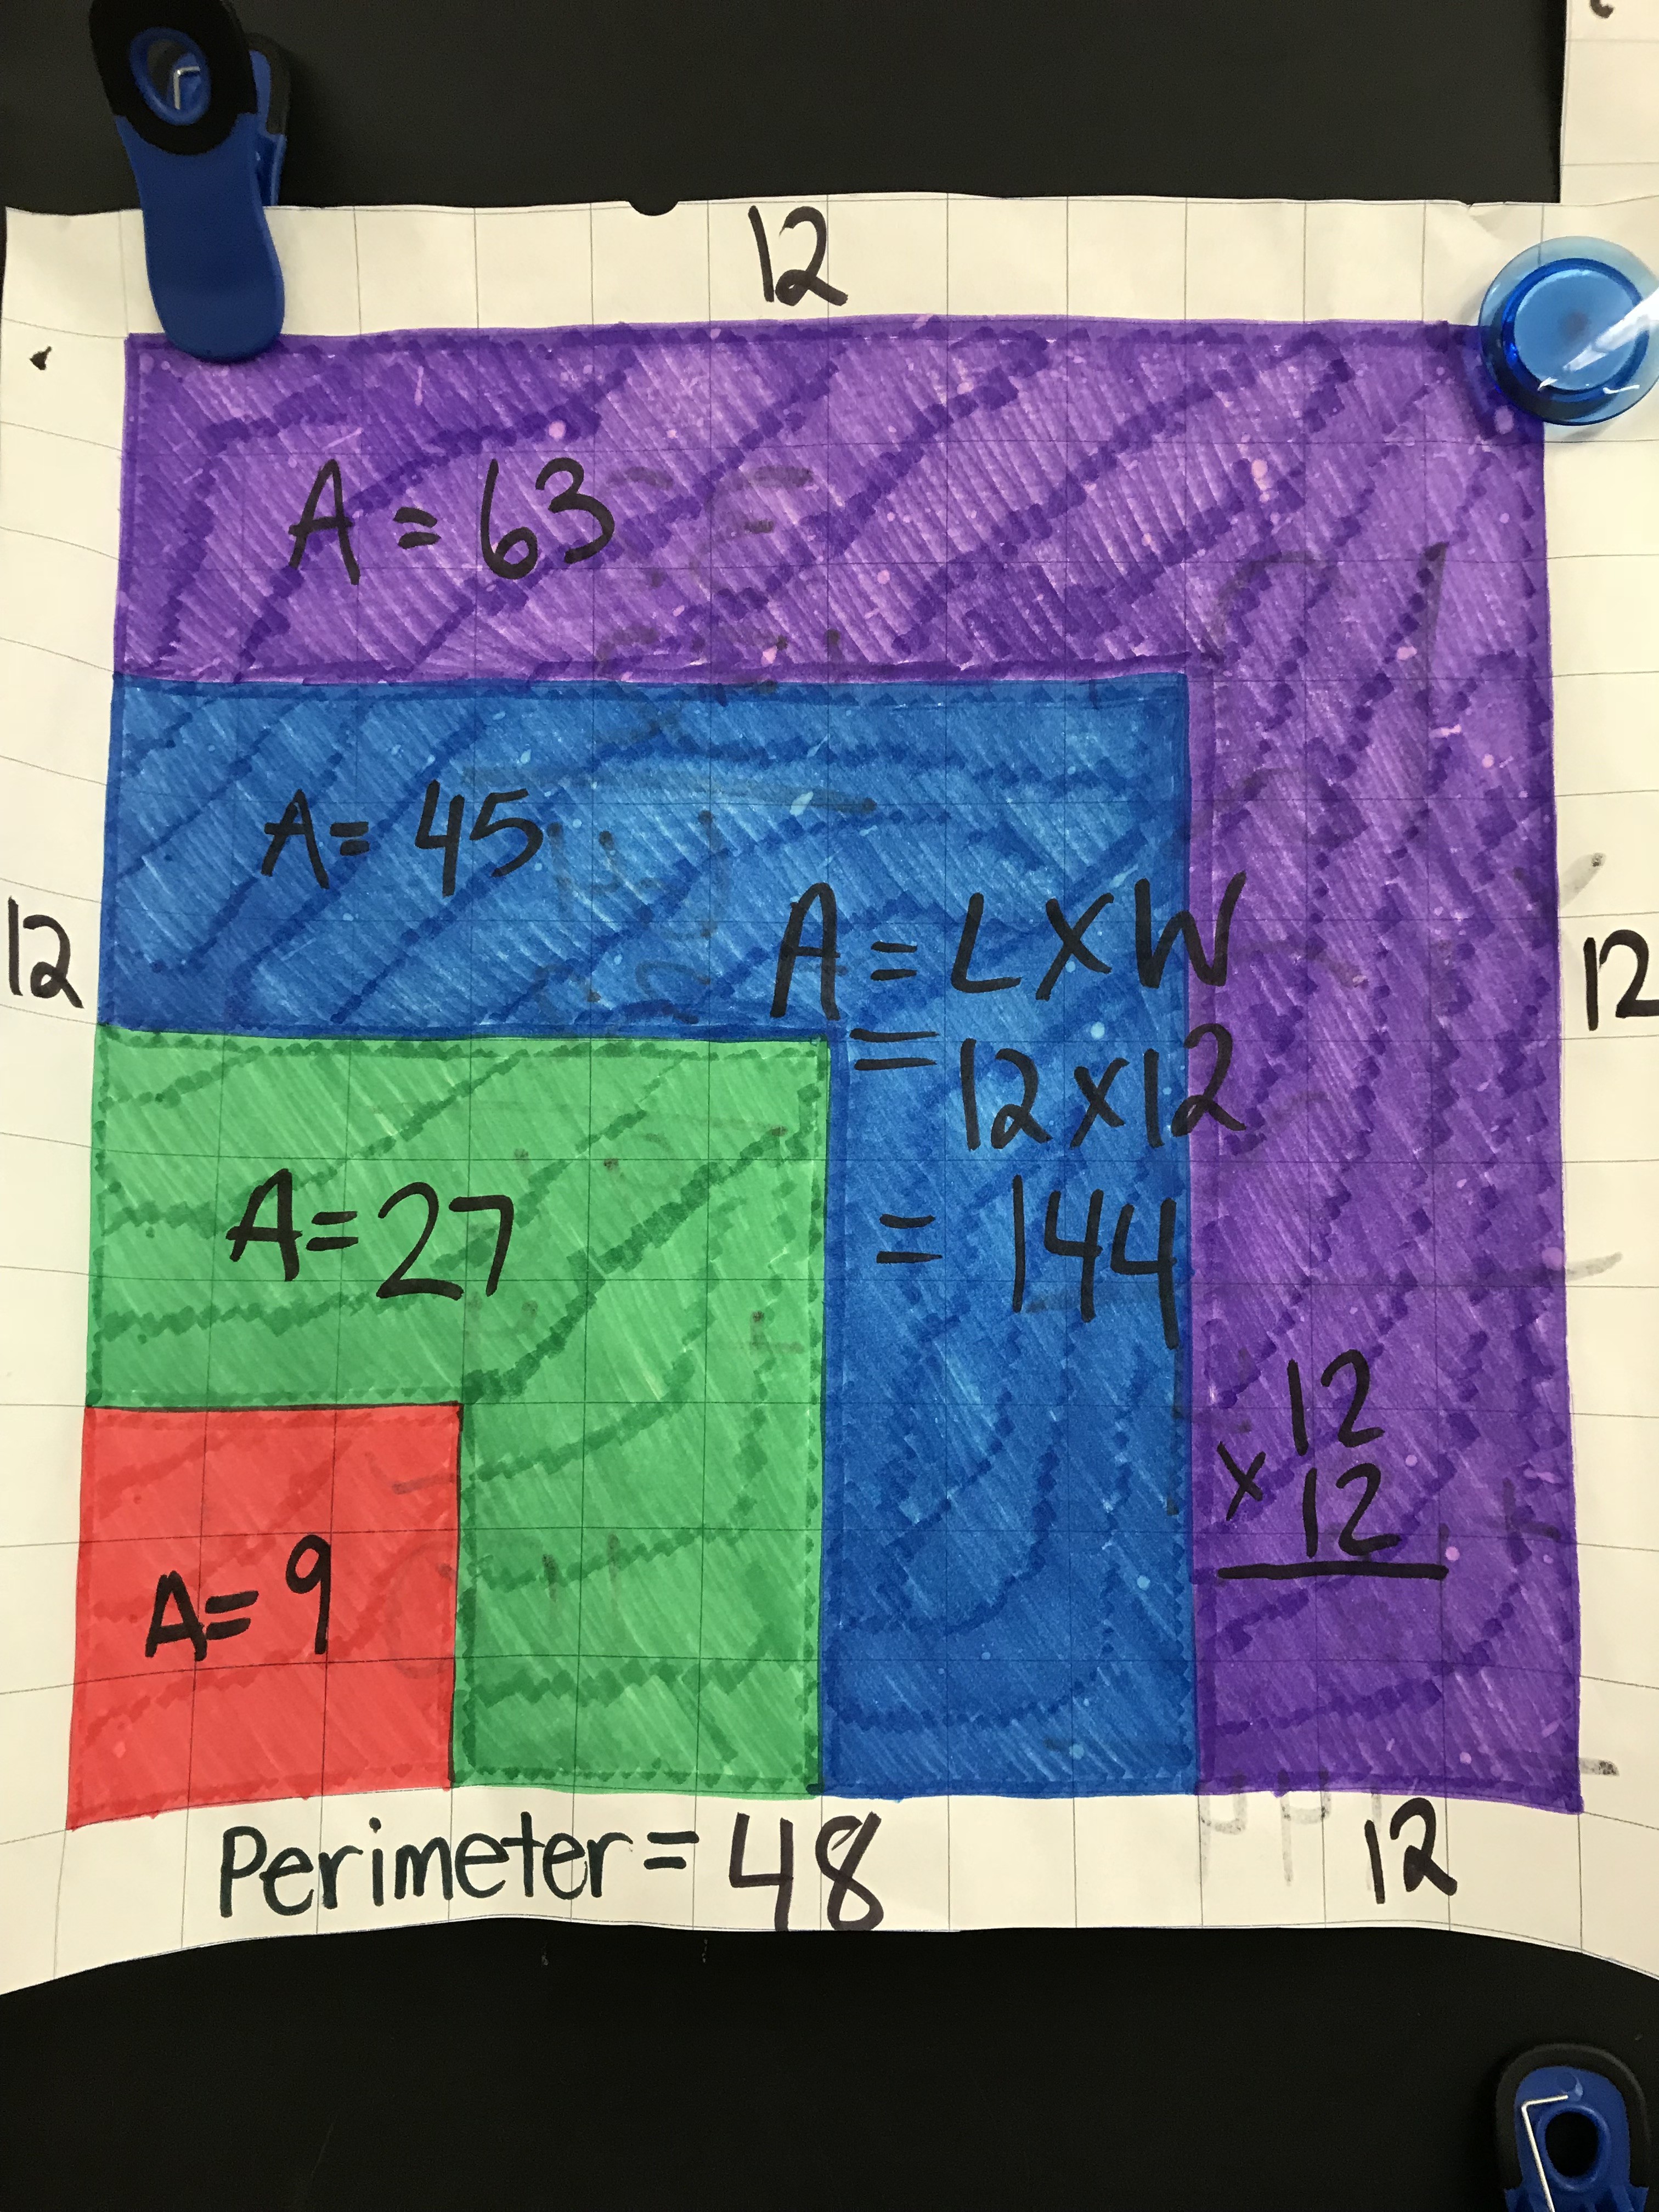
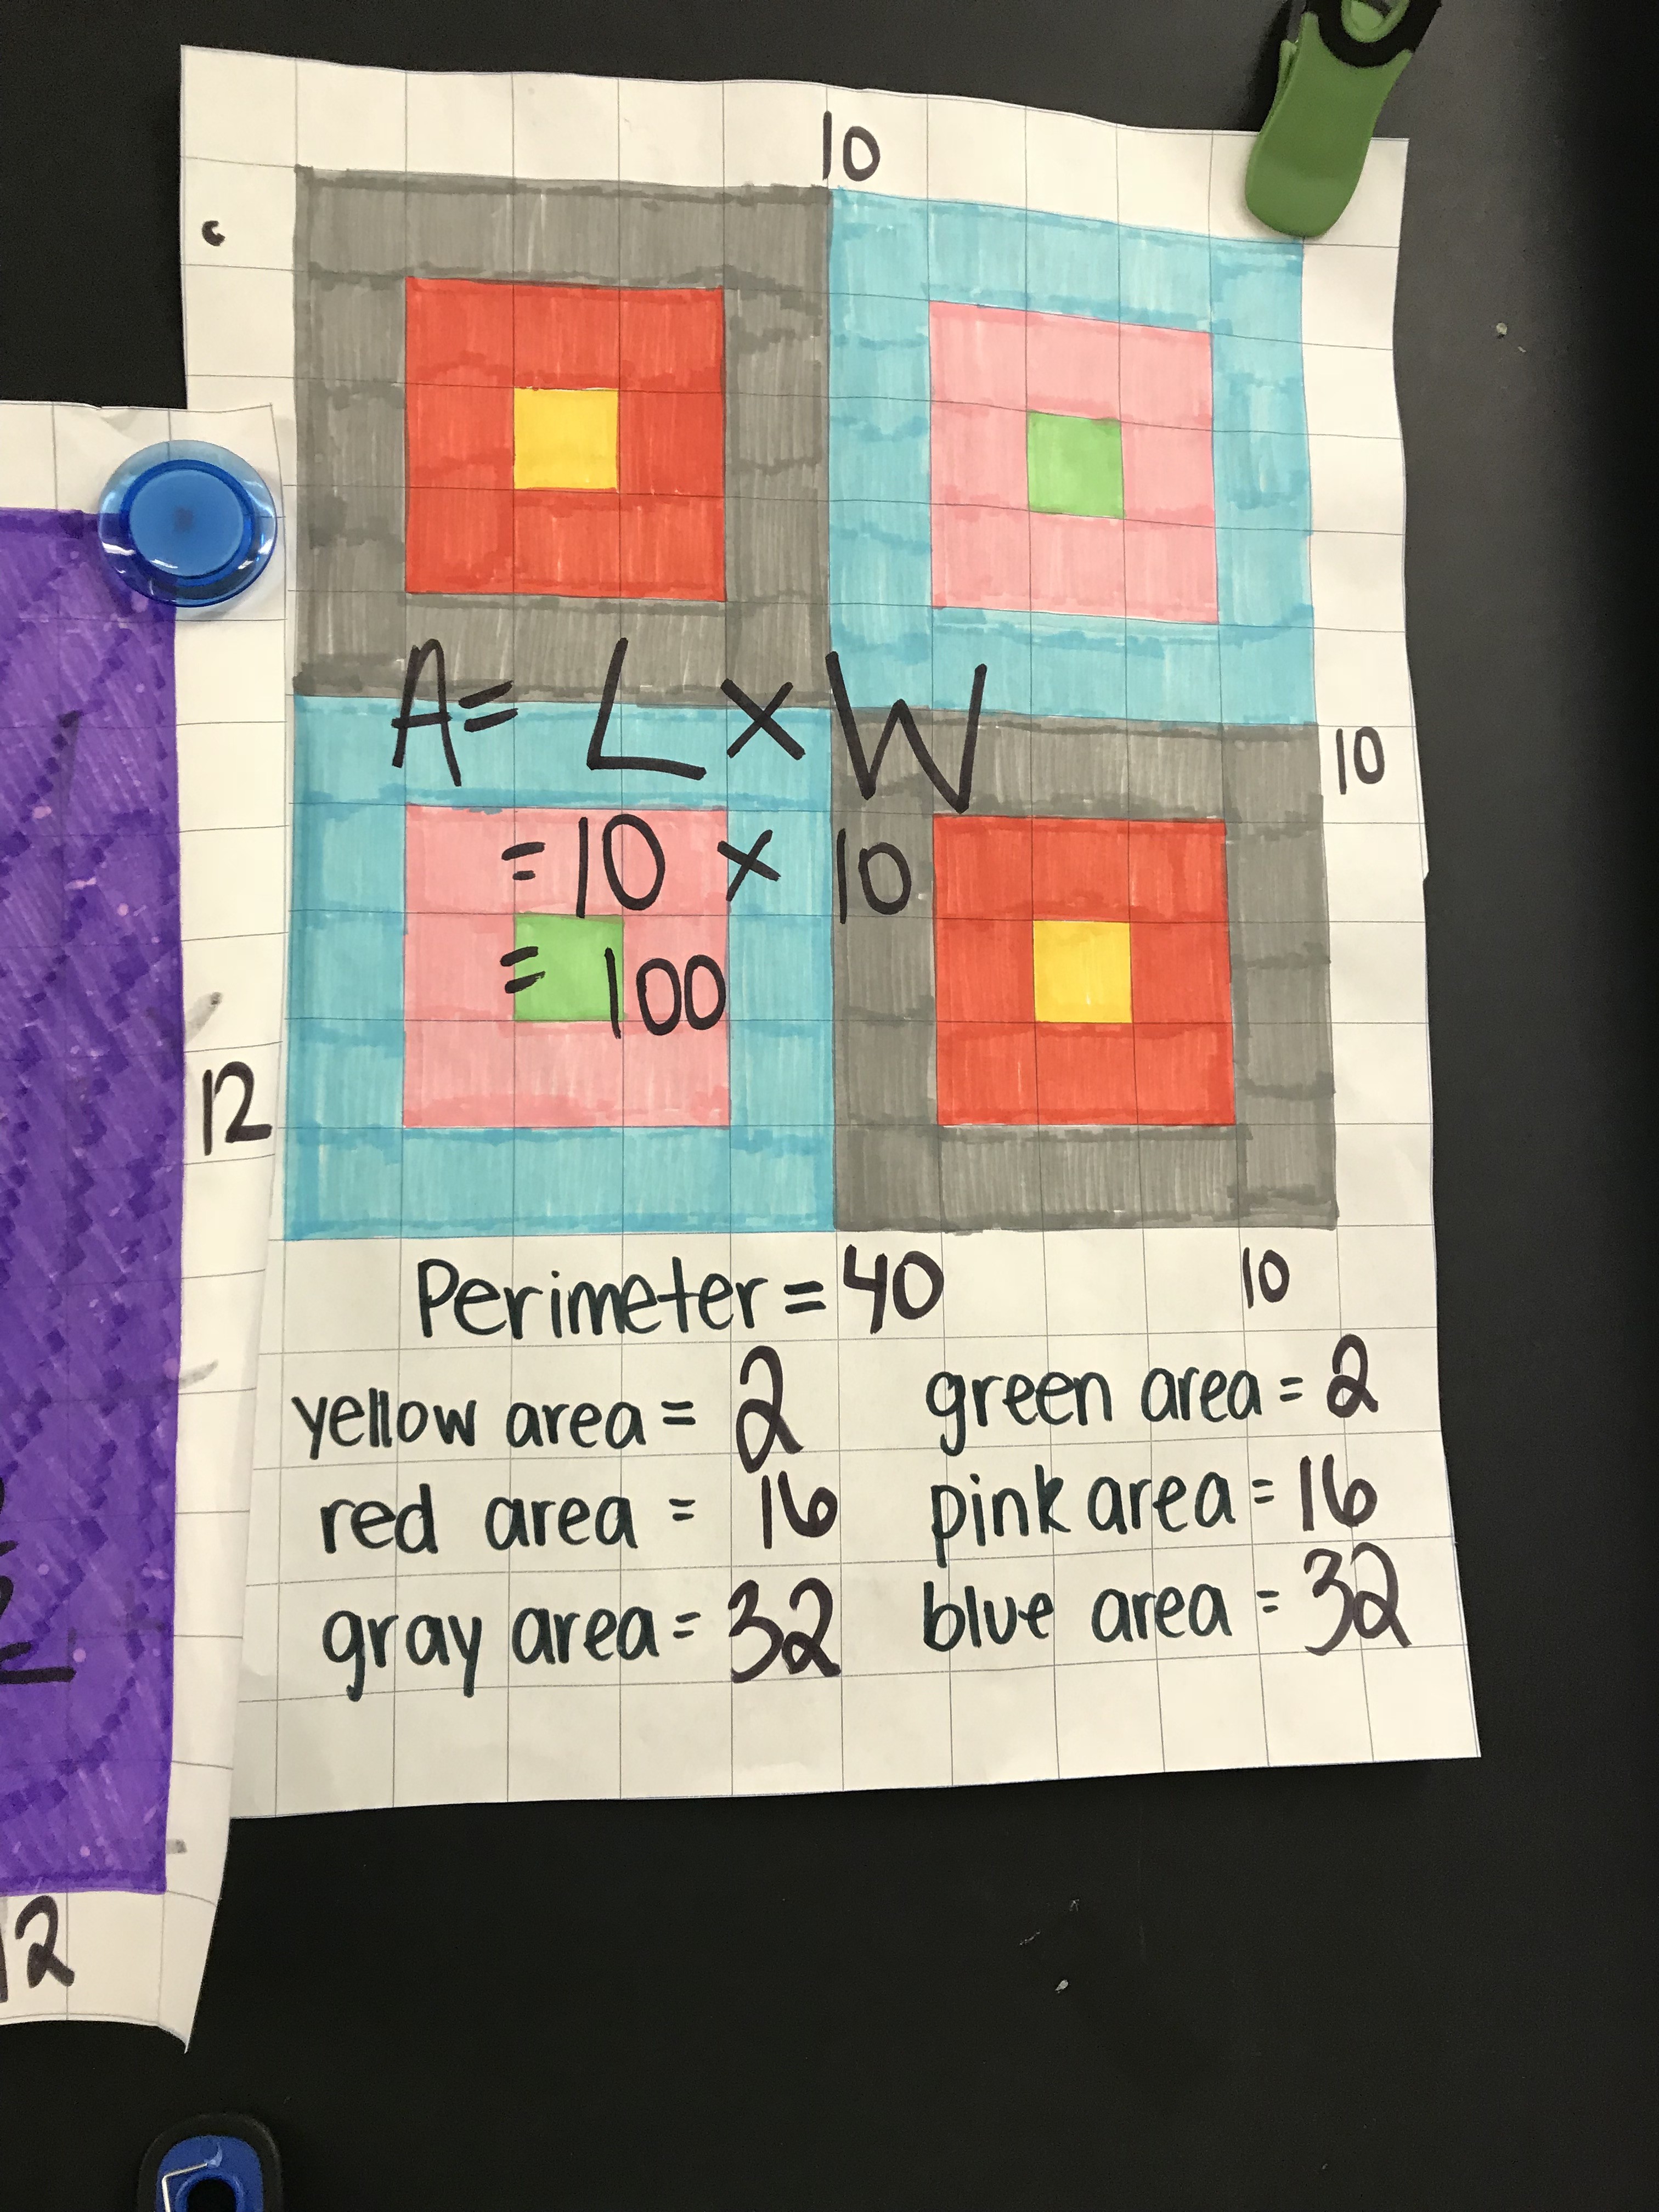
After having the students share their different solutions we thought we would show the students artwork that Ms. Marchiori created inspired by Ellsworth Kelly’s “Colors for a Large Wall”. In a guided math lesson the students figured out the area and perimeter of different parts of the artwork. The way in which students figured out the answers to the area demonstrated that they had a much better understanding of the difference between area and perimeter than they had previously.
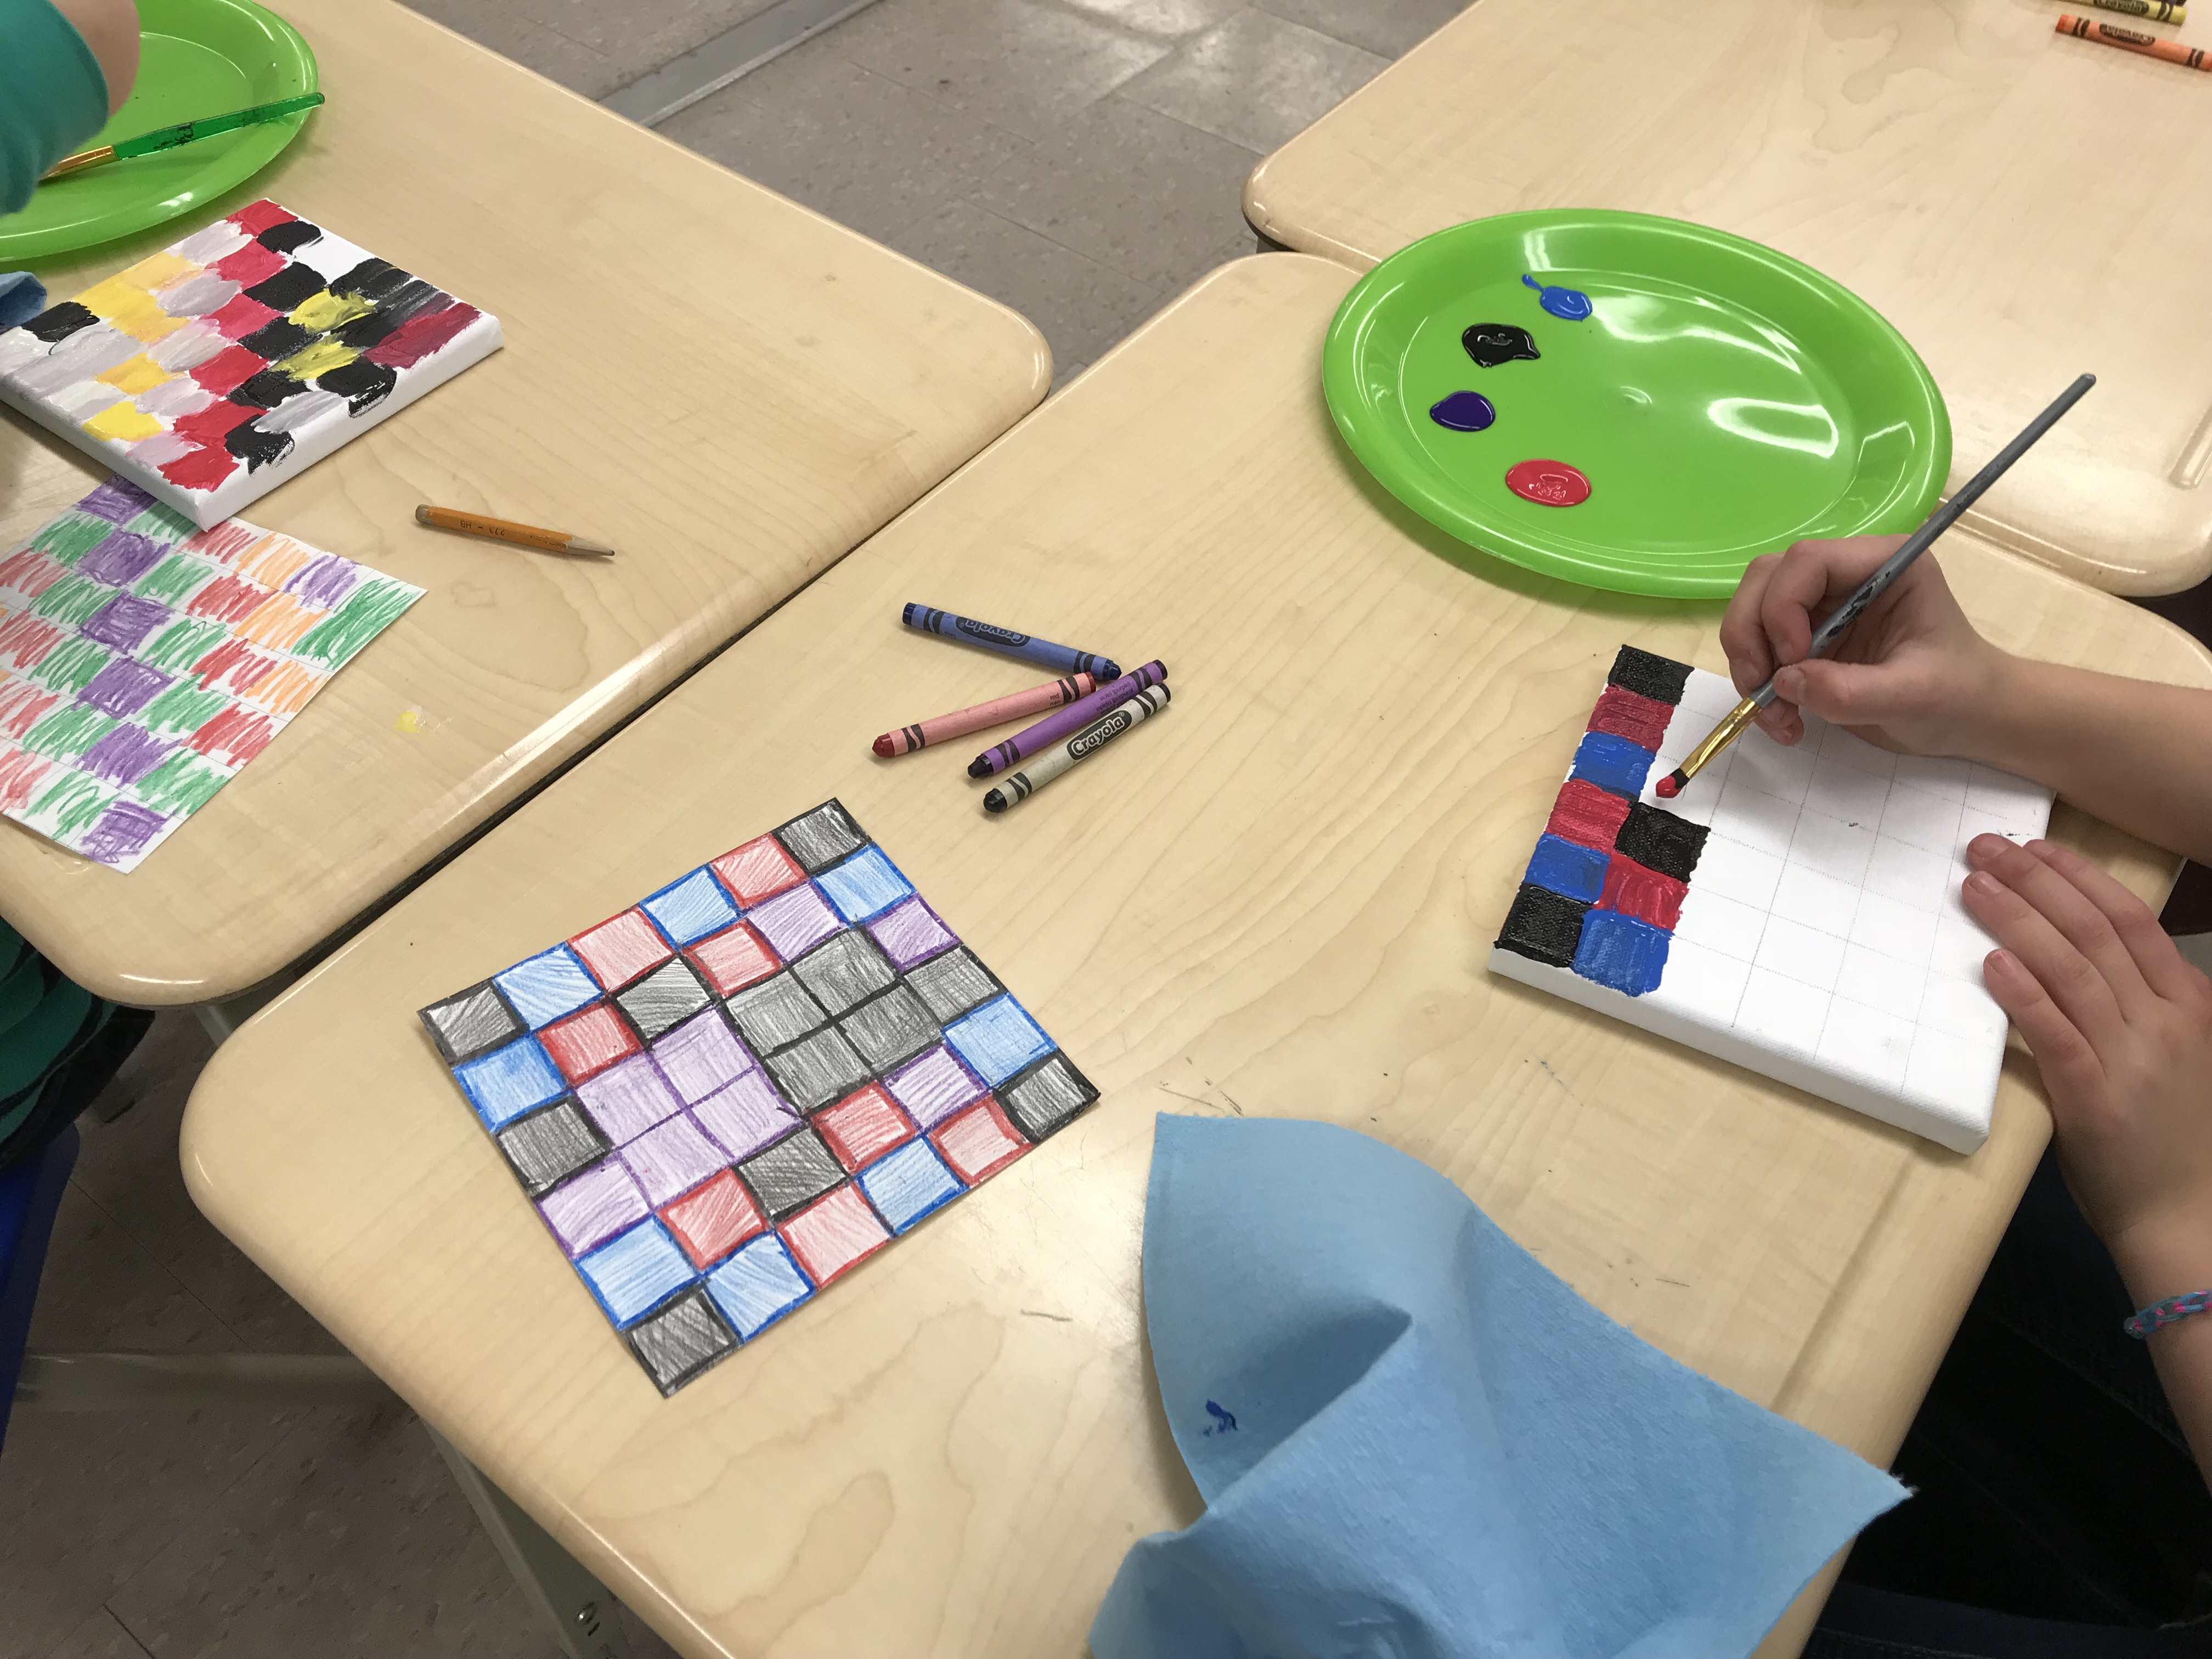
At this point, we wanted to get into the artwork and considered the work of Piet Mondrian. Piet Mondrian is famous for the work that he created using primary colours, horizontal and vertical lines and squares and rectangles. Perfect for working with area and perimeter and for incorporating the different elements of art.
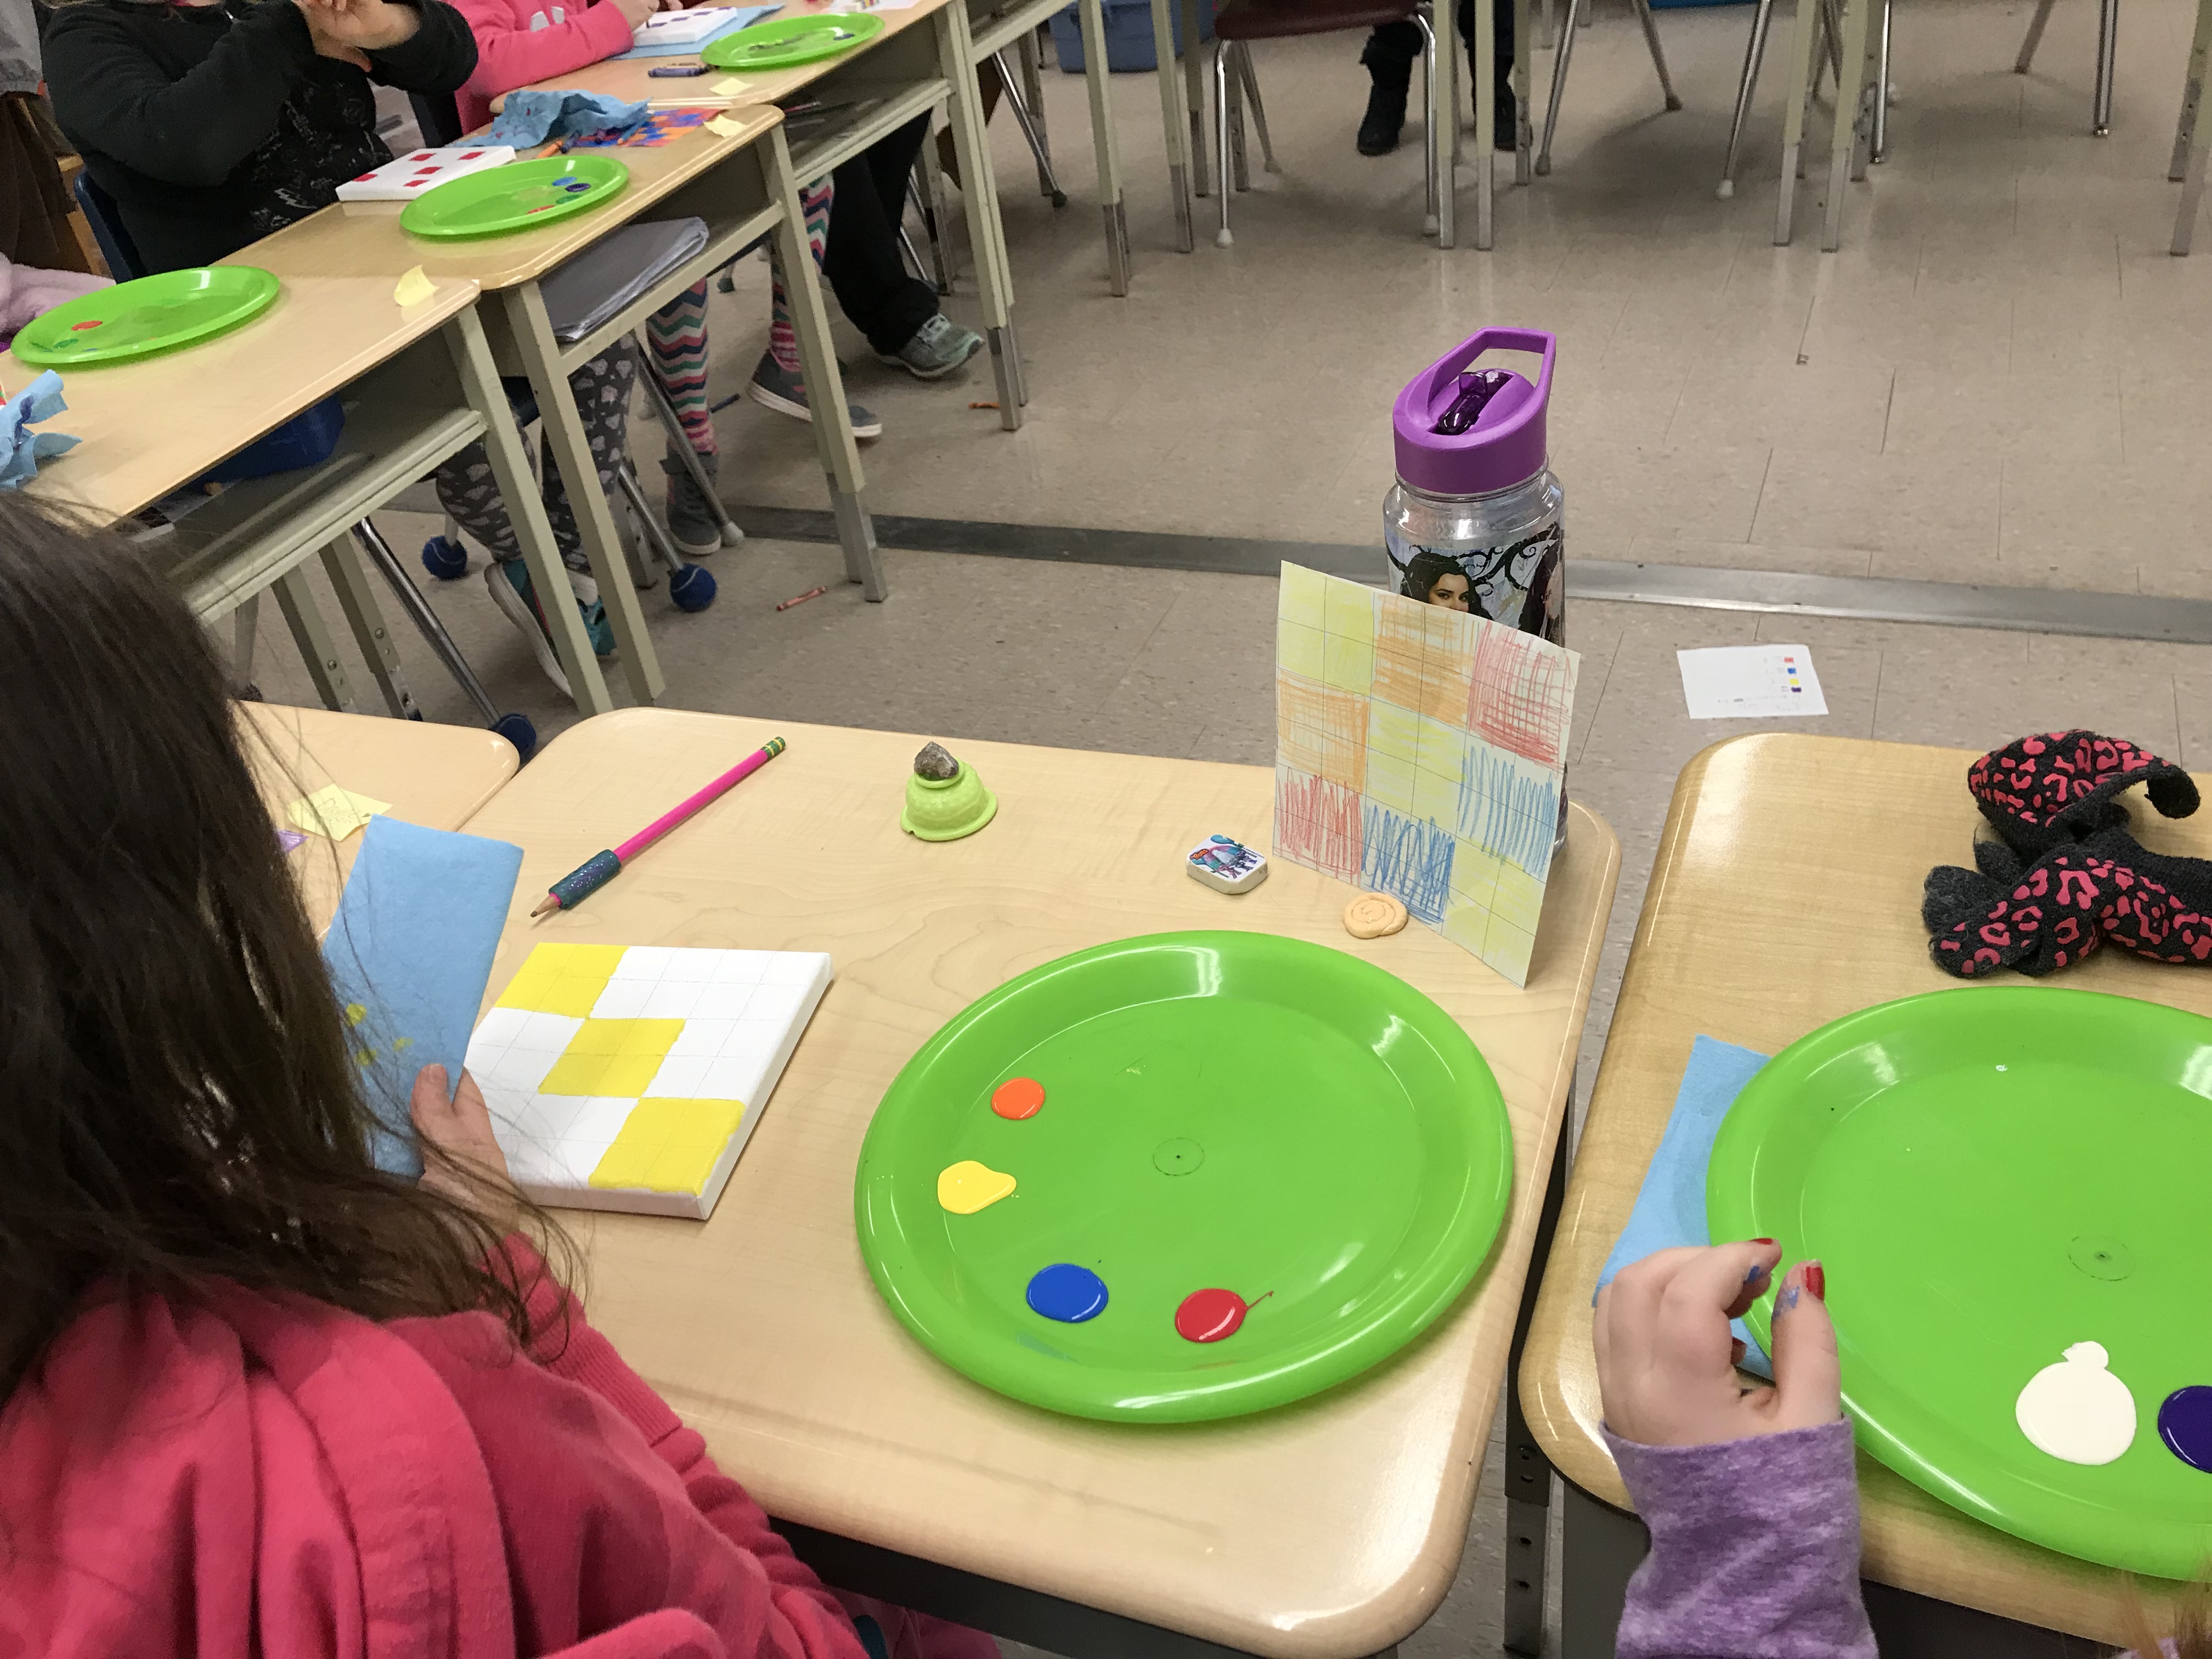
Ms. Marchiori showed the YouTube video of Piet Mondrian’s artistic life in a nutshell. Afterwards, the students then created their own Mondrian inspired artwork using chart sized grid paper (6’X6′) and crayon. To continue our math focus, the students then had to calculate the area of each of the colours that they used and write that on the back of their art “plan”. From there, the students used acrylic paint on canvas with grids drawn in pencil to recreate their “plan” for their art.
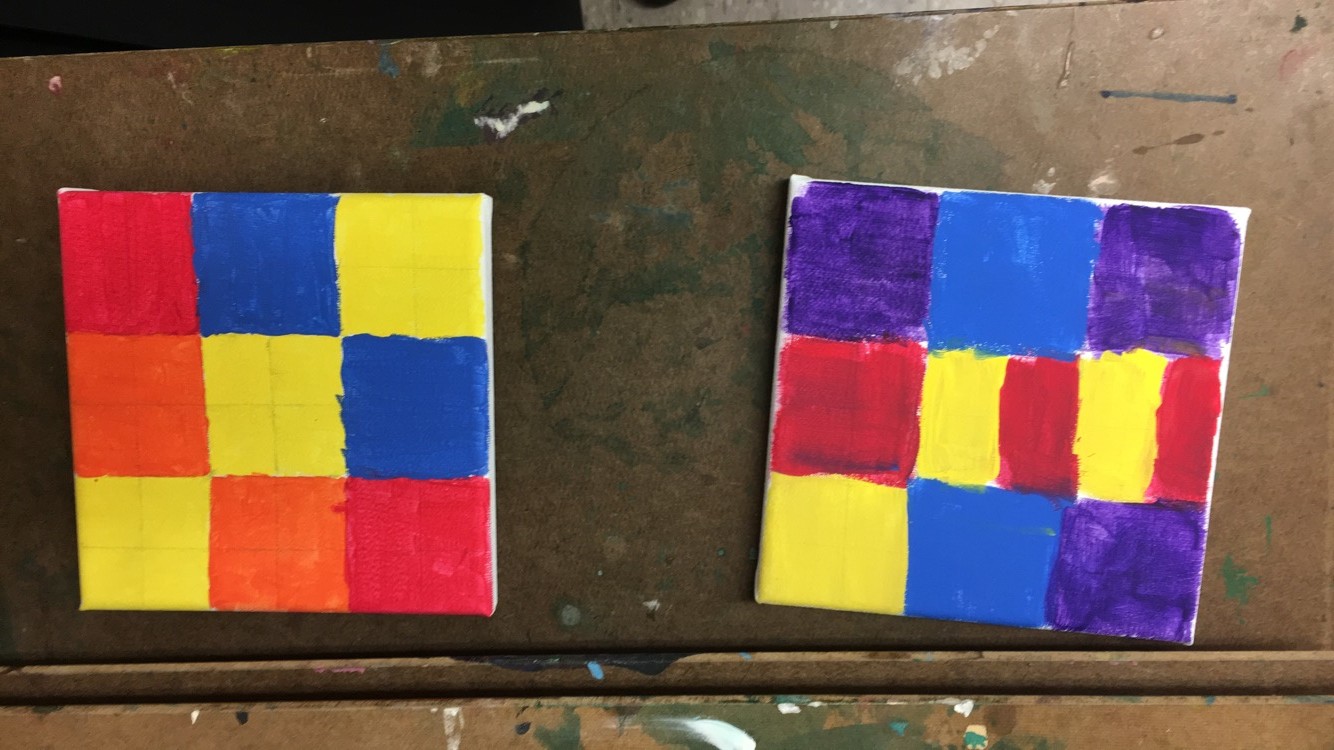
A few of the finished artwork samples;


This artwork would also connect to fractions. Students could express their colour content in a fraction, reducing it to it’s simplest form and then compare which colours covered the largest fraction of the area of the painting. When the artwork is complete, the students will be adding an artist’s message about what they learned during the process about area and perimeter, about the elements of line, colour and shape and about Piet Mondrian. This week we will be creating Mondrian inspired artwork while exploring balance and colour in art using much of the same grid technique but with the medium of crayon resist and watercolours.