Photo of Lisa Taylor

Bulletin Boards – Teaching Tool, Art Gallery, or Wallpaper?

Every classroom has bulletin boards, some have one, some have 10! It all depends on the space you have and how you plan to use it. It is easy to set something up with plans for it to change or evolve, only to find that 4 months later you haven’t touched it, taught to it, or even referenced it!!

In my experience, Bulletin Boards end up falling into 1 of 3 categories: Teaching Tool, Art Gallery, or Wallpaper. Some bulletin boards are a blend of two or even all three of these categories. It is important to make the most of the space you have on your walls, while being cognisant of the fact that many children find too much stuff on the walls to be distracting.

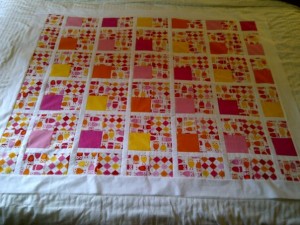
When planning your walls, make sure you check with health and safety regulation, as many school boards have a maximum percentage of walls space that can be covered to stay within the fire regulation. So before you hit pinterest for some great ideas, make sure you are even able to cover the space! In my classroom, I have 5 large boards that cover almost every space that isn’t blackboard, windows or doors. The space that the bulletin boards cover is actually above the maximum percentage I can have covered in paper!! So I can’t paper back my boards as it is a fire hazard.

Many teachers like to paint their boards so they look crisp and clean all year. Again, double check with health and safety, as it is often an issue as it adds weight to the board which might not have been considered when mounting it. Especially if you are the 10th person in the classroom to paint them because the previous colours didn’t suit anyone’s decor!

Once you have established what your health and safety guidelines are, you can start to think about what is going on the walls. Ask yourself a few questions before you put something up there.

1. How will this help the students? While a Word Wall CAN help students, if you slap it all up before school starts and casually refer to it from time to time, it is not a useful tool and it is just wallpaper. Make sure you teach to it. Make it with the class and do it organically!

2. Is this something we need up for more than just today? If you only need it for the immediate future, don’t make a whole board of it. If you want to show off student work, I find the hallway is the best place for this type of thing. It gets more “traffic” from other teachers/students/parents, and it isn’t a distraction to learning. If you do need it for more than just today, you may want to ask a few more questions before you decide where to put it!

3. Do I need to put it all up right away and on my own? As teachers, we hate to look or feel like we aren’t organized, prepared, and ready to go! I recall as a young teacher, putting up bulletin boards before the first day of school. Yes, sometimes I taught to them, but generally they were just wallpaper. Many of us are guilty of putting up the whole word wall kit the day we get it! It just looks so pretty when it is done! Put it up gradually, and with the class! This will make it a more meaningful teaching tool. As teachers, we like everything to look complete and not “in progress” – but having the word wall with just 3-4 words up in September is what your students need!

4. Am I done with this? If you aren’t using it anymore, and the kids aren’t, take a picture of it and take it down! The more “stuff” you have on your walls, the harder it is for students to find what they are looking for. If you don’t need it anymore, take it down!

5. Are the kids using this? Even when you read the research, do the work, cut, past, laminate, and put up a beautiful board, the kids may not respond to it and it may not be useful to them. If you put up a board for math showing single digit addition strategies to start off the year, if they have all mastered it by December, they probably aren’t using it anymore. We have a tendency to keep things up in lieu of blank space to avoid looking like we aren’t accomplishing anything as a class! If they aren’t using it, take it down, or teach to it more, modify it, model how to use it. If after teaching to it more, they still aren’t using it – TAKE IT DOWN!!

There are thousands of blog posts and pinterest boards dedicated to amazing bulletin board ideas. Before you put one up, make sure it is actually something you need, that will get used, and that you install it in such a way that the students know how to access it.

There are great blog posts about what to do with your bulletin boards when you are done. My personal favourite is to snap a picture and create a bulletin board binder. That way, if there is still one of two children in the class that still need that bulletin board, they can go to the binder and look at it all year long! It will also serve as a nice reminder of how they looked if you end up needing to recreate it another year!

Photo of Lisa Taylor

Themes of Success: Passion for Teaching

When I sat down to think about my very first post for this blog, it was suggested to me that I share some information about myself. So that is where I started. I would share that I have taught for 8 years in the Upper Grand DSB (Guelph and area), that I am currently released from the classroom as Chief Negotiator and Staff Officer at my Local ETFO Office, and that I am a crafter, musician, mother, wife, and animal lover. So many ideas came flooding through!

In reading through the first chapter of Heart and Art, I came across the Themes of Success: themes that emerged after over 2,500 teachers were asked to share their best teaching experience from that year. The heading Passion for Teaching (Page 8 ) really spoke to me.

Passion for Teaching highlights the importance of connecting your own personal experiences and passions with your teaching by drawing on your own personal “resources” for support. I decided this would be the perfect place to start, as I could share some ways that I have done this with my classes with great success, and in the process, you will get to know me a bit better!

Patterning with Quilts: As an avid quilter, I brought in fabric squares to my Grade 2 class and had students help me plan a quilt. They loved this activity because it was “real” to them. They got to lay out the squares, plan the repeating pattern of colours (in this case light pink, dark pink, yellow, orange) and then see it come together. I would take the squares home and sew a row or two and then come back and have them recall what came next. I would then sew a few vertical columns and see if they could figure out what the next column would look like as the pattern changes in that direction, but there is still a pattern. We did a problem solving based activity with this quilt for weeks!

When I worked with older grades, I brought in fabric measurements (i.e., 100cm x 75cm in blue, 125cm x 50cm in green, etc.) and had them plan out the entire quilt top from start to finish and then the class voted on their favourite quilt and that is the one I cut and made. It is amazing how many ways using quilts in math can be differentiated too! Giving some students a quilt plan and asking them to use colour tiles to plan the pattern, while others are being asked to measure the fabric that would be needed to make that same quilt, allows for extensions galore!


Animal Creative Writing: Living out in the country, we have lots of animals running around our property. One of my favourites is our chickens. We have 8 chickens that wonder the yard and every now and then, one of them disappears for a while. I often give my class an update on what the birds are up to and they write about them. They love using pictures of the chickens, that I take on the classroom iPad, to illustrate their stories using different apps.

I find bringing my own interests into the classroom really helps my students to connect with the activities we are working on and it makes them feel like what they are doing is relevant.


Photo of Mike Beetham

Keep Them Learning

As June (and all it brings with it) unfolds, minds start to wander, summer day dreaming begins and as a result students start to lose their focus with all the activities that are competing for their attention. This usually results in increased classroom management concerns as well as a significant drop in productivity. My plan at this time of the year is to keep my students as engaged as possible to the very last minute. This is accomplished in two ways. The first is that they become decision makers in what we are going to learn about. This can be done either as a class or as individual learning modules. The students will compose a question to which they will seek to answer. How do words travel from a studio over the radio so that we can hear them is an inquiry chosen by one of my students this year. The questions they create have to be approved and meet the criteria we have pre-established.

The length of this unit is about 3 weeks and will culminate with a classroom open house whereby the other students in the school will be able to visit our work over two days. The student must be at their site in order to share information they have uncovered and answer any questions their audience may have. Needless to say, this unit generates some of the best work of the year. For me as a teacher, it allows me that opportunity to witness (and assess) the transfer of a year’s work of academic focus in  reading, writing and oral language.

The premise remains  the same as I have used drama presentations, storytelling and musical performances to keep my students school focused and engaged until the last minute of school.  I encourage you to share other ideas you have used or witnessed as end of the year units.

Photo of Erin G

Matchmakers: Creative Ways of Forming Groups

I’m always looking for different ways of forming groups either for teams in games or for class projects/presentations. I like to make sure that not everyone is always working together with their friends. In a book called Energizers and Other Great Cooperative Activities for All Ages (Quest Books, 1991) I hit the jackpot. I know it’s an old book but good ideas are good ideas. I found these to be a great alternative to “Choose Your Own Partner” or randomly drawing names on popsicle sticks, etc. Not only did these provide a nice break or “energizer”, they were so entertaining that people forgot to complain about their groups!

Line ‘Em Up

Have the class line up in a single line according to the following criteria:

  • by age
  • by length of hair
  • by the time they get up in the morning
  • by how long they’ve lived in the community

Once in a line, you can then simply count off depending on the number of students you need in a group (ex 5).

Group Puzzlers

  • Select a picture from a magazine for each group you need (ex. If you need 5 groups, you then need 5 different pictures). Cut each picture into the same number of pieces as group members needed and mix all the pieces together in a container.
  • Students each draw a piece from the container and must then find others with pieces of the same picture. When they find each other, they must then put their pictures back together again.
  • *Make sure to select pictures that are distinct from one another.

Stone Soup

  • Fill a pot with groups of common items-the same number and kind of objects as the number of members needed in each group. You could use small rocks, jacks, marbles, squares of fabric, paper clips, paper umbrellas for drinks, etc.
  • Have each student draw an item from the pot. Holding up their selections, they mingle and find their fellow group members who have also chosen the same object.
Photo of Tina Ginglo

Accountable Talk

I agree with Sangeeta, there is nothing like a room buzzing with students…talking!!!   I don’t think that you can have a collaborative engaging learning environment without a little noise.

Frank Serafini has written a number of books about developing engaging reading programs (e.g., The Reading Workshop, Lessons In Comprehension) and he is often invited to speak at large literacy conferences.  In one of his sessions he said, half in jest, that when we read a great book, we don’t get excited and rush to make a diorama.  Rather, we want to talk about the book!  We must allow and plan for productive accountable talk in our classrooms.

One strategy that is popular in my class is called, Paired Verbal Fluency.  I picked up this strategy years ago when I attended a Bruce Wellman workshop series.  He also includes this strategy in his book with Laura Lipton, Pathways to Understanding: Patterns and Practices in the Learning Focused Classroom (ISBN 0-9665022-0-5).  This strategy is great for getting students verbally active before, during and after learning.  I often use it to activate prior knowledge, to review concepts already learned, before the learning continues.  It is also a great strategy for consolidation.  For example, the other day I used it to review what students learned from our study of the Underground Railroad.

The directions are rather simple.

  1. Students work in partners.  Partners decide who will be person A and which partner will be person B.
  2. I present the topic that is going to be discussed.  For example, “What is the Underground Railroad and why is it an important part of our history?”
  3. When I say, “Go,” person A speaks.  Person A begins to answer the question.  Person B listens carefully, but does not add to the discussion.  Person A speaks for 60 seconds.
  4. When I say, “Switch,” it is person B’s turn to speak.  Person B should not repeat anything that person A shared.  Person B is simply building on A’s answer.  Person B speaks for 60 seconds.
  5. The process continues for another round or two, but for each round, the time is decreased by 20 seconds.  For example, person A will now continue to build on to person B’s response, being careful not to repeat anything B said, but this time, A will only speak for 40 seconds.

Students enjoy this strategy. It teaches them to listen to each other.  Other effective strategies for fostering accountable-talk include the Give-One, Get One strategy and the Walk Around Survey.  These strategies also have the added benefit of getting the students moving around the room as well as talking.  Other strategies can be found in the Ministry of Education’s A Guide to Effective Literacy Instruction Grades 4-6 – Volume One, 2006.  You can find this document at eworkshop.on.ca.


Photo of Erin G

A Piece of the Pie – An Accurate Reflection of Personal Contribution in Group Work

Having recently completed a group work assignment with classes, I always find it difficult to really know who did what.  This is in spite of ongoing classroom observations and checking in with me daily with regards to their progress. What I devised to find out what went on behind the scenes was something I give out to each group at the end of the assignment. Equipped with a circular graphic resembling a pie, each group must come to a consensus.  In addition to dividing the pieces of the pie according to each person’s contribution, I also ask that each piece be assigned a percentage value as well as a brief outline of the tasks completed by the group members. So people don’t get defensive, I explain that this is a way to reward someone’s efforts of which I might not be aware.


After having reached a consensus together as a group, they all sign off once they are in complete agreement with the information submitted. At the end, I am left with a wealth of information – a visual representation that speaks volumes, a sometimes startling insight and an accurate portrayal of who did what. I was really surprised by their serious approach and how involved they were in their negotiations.  As mentioned before, some of the findings were surprising (the extent of one student’s work vs. the lack of another’s).  More importantly, I keep them after the fact because a single image represents a lot and comes in handy in future discussions with the student or during parent interviews.

Photo of Alison Board

Becoming One


In just a few weeks, I can see our group of grade one and two students grow as a community. Evidence is in the way they are aware of other’s likes and dislikes, recognize when someone in missing from the group, and readily offer assistance to one other. Like Samantha, I wanted to gather some information about the students to keep on file. In my first newsletter I requested email addresses to set up parents on automatic updates from the class website. I also asked parents the following:

What delights your child?  What makes your child uncomfortable? What goals do you have for your child?

The responses were brief, but insightful. It not only gave me some information about my students, but the priorities and perspectives of the student’s parents/families. In addition to the information requests, I also used Aaron’s suggestion of an All About Me Bag in “The Heart and Art of Teaching and Learning” (p 45). The children were provided with a paper bag. They brought back their bags filled with five items that they felt best represented themselves. The children were thrilled to share their All About Me bags at the community circle and waited with anticipation to learn more about their classmates with each presentation. To the children’s surprise, there were many areas of common interest that were revealed, which resulted in new friendships that extended to recess and the playground.

September was full of new beginnings. At times I questioned whether we were accomplishing enough, such as the curriculum. As Tina discussed in her blog entry, I needed reminders to “go slow.” So as I planned our reading and writing, I tried to incorporate our community-building activities. Two read-alouds that the children adored and were able to easily connect to regarding self-esteem and inclusion, were: One by Kathryn Otoshi and The OK Book by Amy K Rosenthal. These books provided us with rich literature for our reading and writing program, while supporting our  discussions on community.


Photo of Carmen Oliveira

Coming Together With Our Class Motto

Cooperatively working together to create a set of beliefs and promises shared by a class using a class motto is a powerful experience that serves as a foundation for a positive and meaningful learning environment. Creating a class motto is one of my favourite moments as I look back at my teaching career. Every year, it proves to be a very meaningful activity that always brings the students together and creates a sense of pride from the moment the motto is said as a class.

During our first week, I had the students work in groups and use graffiti as a strategy to write their ideas about what they believe our classroom should look, feel, and sound like. This is an activity from the “Heart and Art of Teaching and Learning” which I have successfully used with my classes every year. Groups then discuss the ideas they brainstormed about their ideal classroom and begin sharing and deciding on the ones they believe are most important.  As a class, we create a list using a graphic organizer and then regroup once more to come up with principles that will bring about the feelings, sounds, and “look” of our dream classroom.  This is how our A-Team Classroom Code of Conduct (the class voted on the title) is created.  As part of their daily reflection question in their journal, students choose which principle is most important to them.  This year the overwhelming choice was “We have a ton of fun exploring and learning.”

Our class motto then comes together using the three or four most important principles from our Class Code of Conduct.   These are voted on by the students.  When it is all said and done, we sit back and proudly read it aloud together.  It is one of those moments in the school year that I most treasure.  Each day, after morning announcements and the national anthem, we repeat our A-Team Class Motto and then dive into having a ton of fun exploring and learning!

The A Team Code of Conduct

A Team Class Motto