
Photo of Alison Board

Making Adjustments

As I read the previous additions by fellow bloggers, I look for connections to my own classroom, and what I see is the constant of change. We are all working with different age groups, but consider similar topics, such as adjustments to integrate technology, outdoor education, or making learning meaningful. Like others, I am continuously reflecting on my practice and making adjustments. As I am teaching in a new Full-Day Kindergarten classroom, there are many changes that the ECE and I have made in the last 8 weeks.

In September, our days were focused on establishing routines and building a community with our 27 children. The biggest routines were entry and dismissals, learning centres, and independent reading/quiet time. Then, as the children settled into these routines, we constantly re-assessed our schedule. We found that our children are so social, that independent reading is more like a book club with sharing and discussions. So, we now lead meditation and quiet breathing and stretching exercises after our reading block. Some of the children struggle with stilling their minds, while others have embraced it and look forward to this part of our day.

Adjustments to the classroom are also a constant in FDK. As interests in certain areas increase or wain, I change the spaces to accommodate the children’s interests and needs. I also change the materials. The basics in each learning centre remain the same, such as the blocks in the building centre, however, I may add recycled materials, clipboards and paper, or figures to encourage new relationships with the materials.

The planning has become one of the most challenging aspects of the FDK program, as there is no time for the ECE and I to sit down and exchange ideas. I continue to plan weekly with my Kindergarten teacher partners, then I convey ideas to my ECE while we are in the classroom together. I started off the year with my weekly plans in a binder on my desk (as I always previously used them). Then, I realized that it was more beneficial to enlarge them on an 11 x 17 inch page and hang them in the centre of the room where the ECE, and the Special Education Assistant can access the daily plans with ease. We are also using a web diagram to document the big ideas that are emerging in the classroom and the connections to the curriculum, which is visible to all.

Every day at our gathering circle, I start by asking the children, “How do you feel today?” As the children share their responses, I get a better understanding of what adjustments I can make to ensure it is a successful day for all of us. Making adjustments is just another way of being a reflective and responsive teacher.
Student Led Conferences

The past 2 weeks, I have been preparing my students for Student-Led Conferences, since the Progress Reports were sent home, and conferences were set for this past Friday.

I have never done or seen Student-Led Conferences before, and what an amazing experience it was. Yes, it does take a lot of prepareation for the students, but after a lot of feedback, the parents really enjoyed it.

What Are Student-Led Conferences?
Instead of the formal Parent-Teacher Interviews, my school board has taken the approach to doing Student-Led Conferences, which enables the student to take full responsibility for their learning, and they choose things to share with their parents that they are most proud of and some things they feel they need to work on. They also choose a Learning Skill that they think is the best, as well as a Learning Skill that they need to improve upon.

Preparing My Students for the Conferences:
Two weeks prior to the Student-Led Conferences, we began preparing ourselves for these conferences. It does take a lot of time and preparation, but the outcome is wonderful! First, I laid out all the work my students have done so far. I explained to students that they would look through their work and choose 2 things they were most proud of (could include anything but most were Social Studies Tests, Math Tests, Journal Entries, and Daily 5 Work), and 1 thing they felt they needed to improve upon. Once they chose their 3 items, they were given 2 “star” papers where they wrote why they were most proud of this pieve of work and why (they had to be specific-because they looked at the Word Wall to help them spell, they studied really hard for a test, or they used the Success Criteria to help them in their writing…). Then, students were given one “Next Steps” paper where they wrote about why they feel they needed to improve upon that piece of work, and what they can do next time (use the Editing Checklist, use the Work Wall, etc.).

As a class, we then reviewed the Learning Skills and what each skill means. We brainstormed (and reviewed) some examples about what each Learning Skill looks like here at school. Then students chose which Learning Skill they felt was their best, and explained why using examples, as well as choosing a Learning Skill that they needed to work on, and explained what they can do to improve upon this Learning Skill.

Once all the writing was complete, I created a script that students practiced so they knew exactly what to say, and when to show/explain their work. For many days, students would practice reading this script and showing their work independently, to a partner, in a group, and even their Reading Buddies. We encouraged students to take on different roles as well, to prepare them (i.e. one student would be a mom, one would be a dad, and the other would present to them).

When it came time for the Student-Led Conferences, the students ran the show. They took full responsibility, and THEY were the ones explaining to parents why they need to improve upon the work they chose, and even asked how their parents could support them at home. I feel that the student saying this to their parents is much more powerful than if I were the one saying it. Parents really enjoyed seeing their child’s work, and were excited to come up with ways that they could support their child at home. Overall, the Student-Led Conferences were a huge success at my school, and it was really great for the students to be so enthusiastic about the work and learning they have done thus far!

Student-Led Conference Script:

Introductions: “Hello, Ms. Pryde. This is my _______ and my _________.”

Explanation about the Conference: “I am taking responsibility for my learning. Today, I will be showing you the accomplishments I have done so far at school. I will also be showing some work that I feel I need to improve upon, and will be asking for your input about how you can help me in reaching my goals at home.”

Showing of the Work: “This is one of my best pieces of work because __________________.

I also chose this piece of work as something that I am most proud of because __________________.

I feel that I could improve upon this piece of work because _____________. I think I can improve on it by __________________________________.

I think my best Learning Skill is ________________________ because _______________________________________________.

The Learning Skill that I think I can improve on is _______________ because _______________________________________________.”

Conclusion: “Thank you for coming to my conference. Is there any questions or comments for myself or Ms. Pryde?”


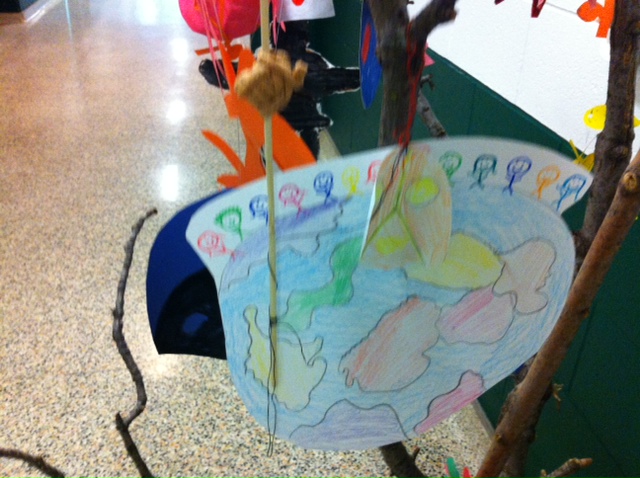
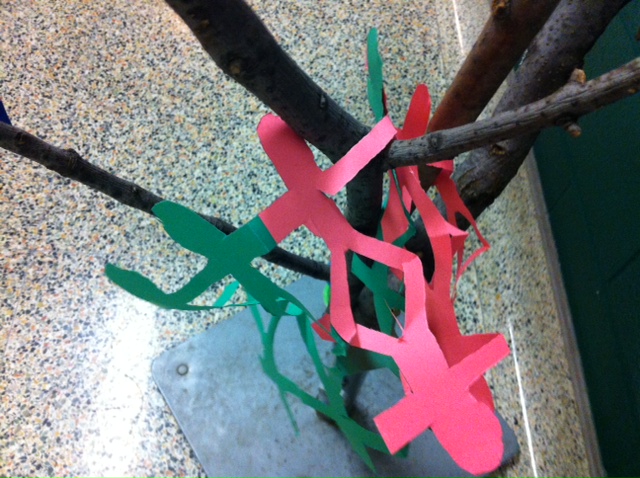
Art work hung to the peace tree

The Peace Tree

Recently, for Remembrance Day, I contemplated how to help my students understand the meaning of this solemn occasion.

My class is made up of students from India, Pakistan, Somalia, Czech Republic, Afghanistan and Slovakia to name a few. Through several discussions, I learned that their understanding of war from their homelands seemed different than what our Canadian soldiers went through, yet the common thread was the idea of peace.

Having seen the film, “The Peace Tree” by Mitra Sen, I thought this might be a good place to start. The film is about a young girl whose family is celebrating Eid. She shares her holidayand customs with her best friend and when Christmas draws nearer, she questions why her family can’t celebrate both occasions. This leads her to make a peace tree with symbols from different religions and cultures. After watching this film with my class, I could see them making connections to their own experiences with religion, exclusion and identity.

We became excited at the thought of making our own Peace Tree and I began the search for the right branches to hold our ideas. Together, we spent some time studying different signs of peace from around the world, such as the diya (India), the Inukshuk (North America), the Yin Yang (China), the Star of David (Israel) and more. My students took materials home in earnest to start making these signs and often came up with their own symbols: flags from different countries, chains of people, and hands.

At our school assembly, while each class was invited to bring a wreath, my class chose to bring their Peace Tree which had also been decorated with poppies. Two of my students spoke at the assembly about why we had created this tree and what it stood for. It has been an interesting experience for me to watch my students get so excited about the different symbols and how the meaning of peace is the same no matter where you live in the world.

We were asked to put our Peace Tree outside the school office for others to enjoy and my students often ask when we are getting it back…they want to add more to it!


Word Wall Bulletin board

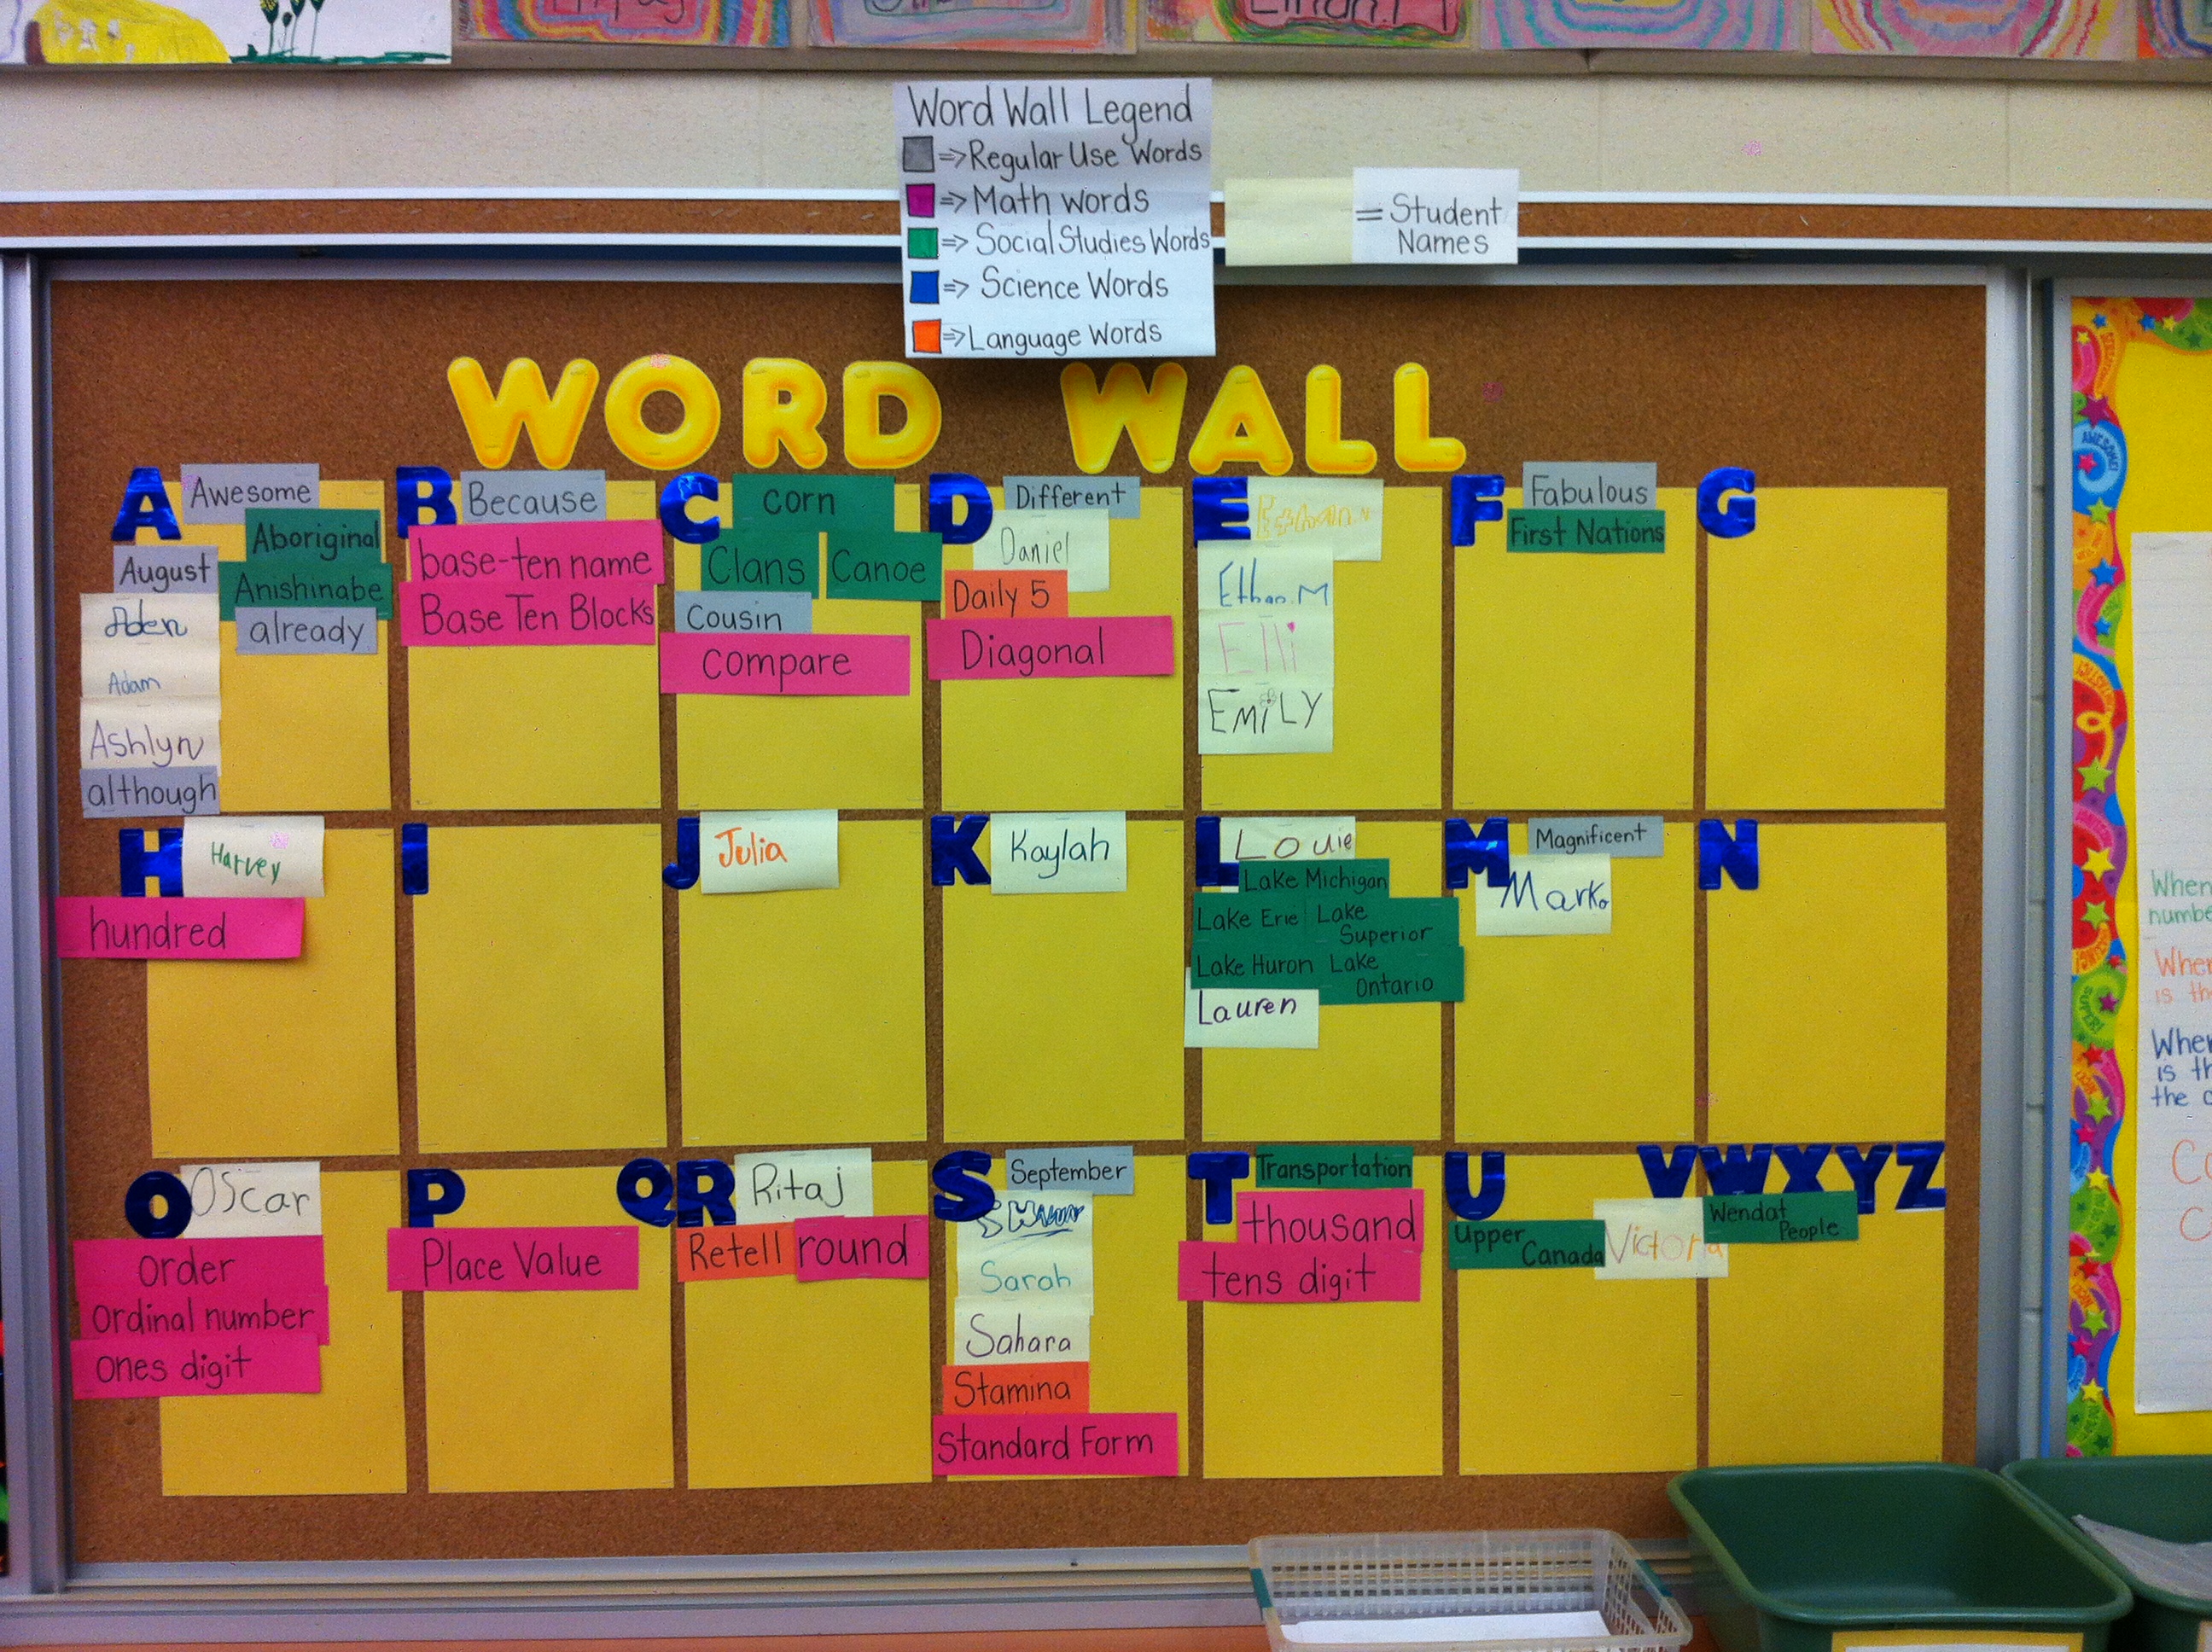
Cross-Curricular Word Wall

As some of you already know, when going for an interview, some type of comprehensive literacy question typically comes up. I have thought long and hard about my answer and I have got wonderful feedback based on my answers (I got got my current LTO simply because of my comprehensive literacy answer). One thing that I think is so very important is to show that you, as a teacher, enjoy cross-curriculum, and bring literacy into all of the other subject areas.

One way I have done this is by having a cross curricular word wall. I have created a legend that is on top of my word wall that explains to its readers what each colour of paper means. For example, Grey is the regular, everyday use words, pink is math words, green is social studies words, blue is science words, and orange is language words. I have yellow post-it notes as the students’ names. As we are still building up our word wall, there are not too many words, however, you start to see how the different colours add to the word wall and you can really see how to bring literacy into all the subject areas.

A sign that say No Bully Zone

My Grade Six Bullying Task Force

In light of the focus on bullying that has come as a result of Amanda Todd’s heart breaking story depicting the path that led her to put an end to the pain and feeling of helplessness she endured for so many years, our class devoted much time and discussion to this urgent topic.  I, like every educator or parent reading this, find myself faced with the issue of bullying on a regular basis which can feel extremely frustrating.  However, this time around, I decided to take the topic further.

As we read picture books, learned about real life stories, analyzed the roles of the bully, victim, and bystander, and thought about what creates the mentality of a bully and the victims, we came to the realization that the knowledge and understanding we need to effectively deal with this issue lies within us.  We looked at ourselves, our care givers, the media, and our lifestyle to find the answers.

Earlier in the week, the government announced that a task force would be created to study this on-going issue on a deeper level in order to come up with strategies and recommendations to support the need for action.  I would like to save the government hundreds of thousands of dollars by sharing what my Grade Six Bullying Task Force created within the span of five days.  Keeping in mind that I am referring to a group of 30 ten and eleven year-olds, the experience was quite simply enlightening.

In a nutshell (and using “big words”), the main ideas discussed included the following:

  • we have all experienced the roles of being the bully, the victim, and the bystander.  Maybe one role has been more dominant so far, but if we take a careful look, we’ve taken on each of these roles at some point in our lives.
  • our upbringing and experiences with our care givers have a significant impact on the roles we choose to take on. No one is born a bully or victim.  Both come to be as a result of the words, emotions, and actions we are exposed to as we begin to make sense of the world.
  • we have a choice about the roles we take on in life.  The power lies within us to choose whether we will be a bully, a victim, a bystander, or none of the above.  Kids need to learn how their thoughts create their reality.
  • education through self-awereness is the most powerful way to unravel our ideas, beliefs, and feelings with respect to how we treat others and would like to be treated.  This will not work if educators and care givers continue to give a “time-out” to those who bully and pat on the back with sympathy to those who are victims.
  • we need to educate the ones who bully (including their care givers!) through self-awareness, empower the ones who are victims by working on their inner belief system, and hold accountable those who decide not to make a positive decision to change by taking legal action that has an impact on their future.
Bullying will not go away by spending millions of dollars on research and resources.  There has to be a fundamental shift in the way we educate and empower people to understand that our ideas and actions originate from a belief system which must be changed at the core if we’re to move forward into a positive way of being.  If a class of ten and eleven year-old get this, then we owe it to them to make it happen.
Photo of Tina Ginglo

What a Difference A Year Makes

This time last year I had just returned from a seven-year absence from the classroom.  During the seven years I was working in various centrally assigned positions, I had many opportunities to visit K-12 classrooms across the Greater Toronto Area.  You could imagine my excitement!  I observed many effective lessons and teaching strategies, classroom set-ups and routines.  I couldn’t wait to adopt some of them for my own program.  As well, I felt my literacy and numeracy program in my last school and teaching assignment was effective and I planned on resurrecting many of those strategies and routines with my new group of students in my new school.

September 2011, I was teaching a new grade (grade 3) in a new school community. I expected my classroom management to be a tad rusty and it was, but there were many initial problems that I could have avoided had I not taken some things for granted.

Prior to leaving the classroom for central positions I taught grades 4 and 5 for more than half my teaching career.  I provided prep coverage to grade 3 students over the years, but I never had a third grade teaching assignment.  I expected grade threes to be similar to my grade fours in terms of social emotional development and their ability to work independently.  After all, it’s only a year difference…what a difference a year makes!    The students were so “little” compared to my grade 4s at the beginning of the year.  I started the year with the mind-set of a junior teacher. I didn’t expect that I would have to model routines such as using the pencil sharpener!  This year, I began the year thinking like a primary teacher.  I take time to model the simplest routines, over and over and over again.   My expectations are more realistic.

I believe in collaborative knowledge building.  My classroom set up has always reflected my beliefs about teaching and learning.  In my last school, I didn’t have desks in my classroom.  I had 6-8 tables and I never seemed to have a problem getting students to work both collaboratively and independently in this setting.  Naturally, when I was setting up my classroom last summer I immediately placed the individual student desks into groups of 4.  The fact that most, if not all, of the grade 2-7 teachers in the school arranged their desks in pairs didn’t register.  Sometimes I need to be hit with a brick to get a message.  My students were not ready to work in groups.  By the end of week two, my classroom looked like all the other classrooms in the school, with students sitting in pairs in long rows.  I hated it, but the students were more settled and were better able to focus.  I managed to finally get them into groups of four when we returned from March Break.

On the first day of school, I did my usual spiel about making smart choices.  I told the students that they could sit wherever they wished as long as they were responsible in the choice they made.  I warned students that if I felt their choice was interfering with our learning I would move students.  This always worked for me in the past. Of course I had to move students around, but it never was a disaster.

This year, I started the year with the students sitting in rows of two per group. I purchased three sets of calendar numbers and taped them to student desks, coat hooks and cubbies.  When we entered the classroom on the first day of school, I invited all students to stand at the front of the classroom.  I quickly reviewed odd and even numbers with the students.  I then invited the boys to hang their bags on an odd numbered hook, pick up their name card, and sit at the desk with the same number as their coat hook.  Next, I invited the girls to find an even numbered hook, pick up their name card and sit at the desk with the same number as their coat hook.  There were no problems at all.  I have groups of two, boy-girl groups.  I have shuffled a few students around, but it really made the first day, first week, first-month of school more structured and settled.  I think it is a bit of a compromise on my part.  I want to keep to my belief that students should have choice and control in the classroom, but at the same time, taking the pressure off of the students who are not ready to make those types of choices right now.  What a difference a year makes! 

This number system really makes planning for supply teachers and lining up so much easier as well.  Instead of having a floor plan prepared for supply teachers. All I need to do is leave a list, 1-22 with each student’s name beside a desk number. I can move the furniture around and not have to worry about updating my floor plan, just as long as I update my class list with desk assignments.  Students also know they must line up in their numbered order.  All their teachers have a copy of our class list with their desk assignments.  It has made transitions so much easier on teachers and students.  What a difference a year makes!

In the years I was out of the classroom, I guess I took for granted all the structure, the little details, that did exist in my past classrooms and the classrooms I visited that would go unnoticed by visitors.  Structure doesn’t necessarily mean that we are taking choice and control away from the students.

Creating the Environment for FDK

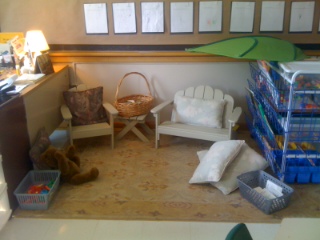
As I mentioned in my last post, our Full-Day Kindergarten room was formerly a Special Education classroom, so it is evolving each week as I acquire furnishings and materials. With a limited budget I have been busy searching for some small scale furniture items and resources that will provide an inviting and engaging learning environment. One of the first centres that I focused on was a Reading Centre. Although I had a carpet and cushions to define a reading area, the children were not frequenting the space as expected. Last weekend I was able to source a small set of outdoor furniture from a friend that only required some sanding and painting. I then went to IKEA to buy a canopy leaf that would define the space (hanging a curtain or fabric as a canopy is also effective). Baskets were used for organizing the books, and I also added a container of magnetic letters to use on the front of my desk which frames the reading centre space. The Reading Centre is now an inviting area that is enticing all the students to settle alone or with a friend to look at a book.


In the photo you will notice a covered chalk board above. I found that the black chalk boards surrounding the areas were not useful, so I covered them with brown craft paper. This provides a neutral background to display the children’s work. In this area as seen in the photo, I glued a piece of black construction paper for each student (26 total) and used paperclips to hang their current “Self-Portrait” representation. As noted on page 85 of The Heart and Art of Teaching and Learning, the self-portraits provide a gallery of the children’s work, as well as a source for assessment. Each month the children complete a new self-portrait and it is added on top of the previous month. Over time, one can see the development of fine motor skills, pictorial development, and writing abilities.

The other centres that are popular at this time are the blocks/building centre, drama centre (we just received a fridge and sink), and the play dough table. I do not have a specific number of students for each centre, however we limit according to what makes sense. If 5 or 6 children want to play in the dramatic centre, the children can accommodate to make it work. However, if 10 children ask to go to the drama centre, we say, “There isn’t enough space today,” and the child selects an alternative.  We are still adjusting our centres to meet the students needs and interests. This week I will be working on the art studio, writing centre and math centre. In the next blog, I will provide updates on this progress.

Photo of Sangeeta McCauley

Talking and Listening Chairs

As I look back on this past week, I realize that I spent very little time teaching curriculum and more time working on life skills. I have two choices at this point. I could think, “Oh wow, I’m really far behind!” or “I’ve made a huge investment that I hope will pay off in the future.” I choose the latter.

My students have been coming to with me problems that happen at recess: someone left them out of a game, two friends were whispering something not-so-nice about them or they saw someone being treated badly and didn’t know what to do.

When we talk through these problems, it’s obvious to me that they have the answers on how to solve their issues, but they need a tool to help them do so.

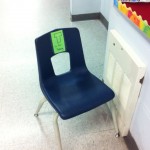
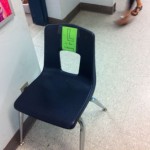
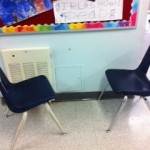
So, I introduce the talking and listening chairs. One chair is marked “T”, the other “L”.

We use one of the problems that happened to illustrate how to use the chairs. For example, “Bill” was upset that “Megan” was not listening to his ideas when they were trying to solve a math problem together. So, Bill sat in the “T” chair and Megan sat in the “L” chair and each had opportunities to talk about what was bothering them and listen to how the other person was feeling. It quickly became evident that they was room for compromise on both ends and they seemed relieved to be able to move on from this problem.

Like most tools, the talking and listening chairs also have boundaries, which I discuss with my students:

* If the person you want to take to the chairs is not ready, you may need to wait.

* If you go out to talk, you will need to attentively listen as well.

* If the problem takes longer than 10 minutes to solve, you may need some help.

* When classmates are using the chairs, we can show respect by giving them some privacy.

* If there are many students involved in the problem, we may need to discuss it as a whole class.

When students ask to use the chairs, I keep track of what time they step out in the hallway and occasionally walk by the door, so the talking and listening remains positive and focused.

As a tool, it can be very successful at helping students who lack confidence to speak up when something is bothering them. I especially enjoy watching, when some of my students who are still learning English approach a classmate to say, “I need to talk to you.”

I have yet to teach a curriculum subject that is more rewarding than that moment.

Photo of Erin G

Reinventing the Wheel – Improving Past Practice

One advantage of entering your second or multiple year(s) of teaching is being able to go back and reuse materials you had previously gathered and created. The mad and desperate scrambling for resources during the first year of teaching a subject is what many would attribute as being the most stressful part of the job. Having a bank of lessons/activities/assessments allows you to devote more energy and thought to the many other aspects of teaching.  As everyone is aware however, the need to consistently update, revise or in some cases, entirely revamp your program is a necessity. Apart from being an obvious benefit to your students, it is a way to push your own limits of creativity. I’ve found that this task is much easier and productive if undertaken sooner rather than later. It can be particularly tempting when your best plans and intentions go awry to want to immediately block out the experience or at least relegate it to the realm of distant memory with “well, I know I won’t be doing that again”. Without belabouring the “reflective process”, I try to efficiently take stock of the success or failure of activities and assignments as soon as they are completed by jotting down impressions on a sticky note and then adhering them to my printed master copy. At the same time and using the same sticky note procedure, I also solicit the input of students and ensure that everyone has the chance to comment at some point during the year. At the end of the process, I have a bank of input available when it comes time to plan for the following year. Sometimes, “reinventing the wheel” can be as simple as changing the assignment pairing (from an individual to small group) or restructuring the order in which things were taught or assessed. Of course, this process can be more stimulating and interesting if you have the opportunity to debrief and compare with your grade team or teaching partner, all of whom will bring a different perspective and insight to the table.

Photo of Erin G

Keeping It All in Perspective – Teaching Really is a Far-Reaching Profession

As teachers and former students ourselves, we know the impact that we can have on students. One just has to think about “rateyourteacher.com” or think back to our impressions of our own past teachers to realize how distinct and ingrained our memories really are. As we embark on another (or perhaps the first) year in the most “noblest of professions”, it seems like a good time to psych ourselves up with such inspirational thoughts before we are rendered irate and exasperated by that particular student who drives us nuts. I originally planned to address one of the suggested topics of discussion regarding your “most remarkable student” and how you were able to make a difference. In the process of reviewing the legions of young adults I’ve come into contact with in the past 10 years of teaching, I digressed and instead became sidetracked with the notion of time. Nothing brings home the quick passing of years like bumping into a former student who is now teaching your own children. For those of you who have also taught for a while, I’m sure you can relate. Mentally flipping through the faces of all my former students in search of the most remarkable brought to mind many who stand out for their compassion, their funny jokes, their temperamental nature, etc. There are also those who are memorable not only for who they were, but also for what they became – the suicide, the innovative scientist, the high school dropout, the successful entrepreneur, the teenage mother, the infamous actor, the murder victim, the accidental death. What struck me as interesting was that for both of us, we remain frozen in time and are lastingly perceived as a grade 8 teacher and a boy/girl of fourteen. All of which made me appreciate the fact that each year with every new batch of students, relationships, interactions and impressions are formed and will mutually impact us in a way that is more profound and enduring than we realize.